FAQ
Frequently asked questions on W&H products and helpful descriptions on the topic of hygiene and care.

 Couplings

-
Roto Quick (5)
-
Can the W&H coupling be thermodisinfected and sterilized?
No, thermodisinfection of the coupling is not permitted; sterilization in steam sterilizers can be applied at a temperature of 135°C. Hot air sterilization and/or cold sterilization (placing in liquids) are not approved.

-
Are there other couplings than the Roto Quick available?
Yes. W&H also offers the "RM-34 LED" for Multiflex® connection.
-
Can I use all instruments which fitted the old Roto Quick coupling (924, ...) with the new RQ-24 too?
Yes. All existing and new instruments can be used with couplings from both the old and the new generations.
-
How does the new W&H Click & Pull system work? How do I remove a dental turbine?
Use your thumb and index finger to retract the coupling's retention sleeve. The turbine can now be removed from the coupling without any problems. Pulling forcefully on the dental turbine can cause damage. If excessive force is required to remove the turbine, verify that the retention sleeve on the coupling can be moved without any problems.
-
Why is a 6-hole connection required for the use of an LED turbine?
A 6-hole connection for the turbine tubing is necessary to supply the turbine with electricity via electrical contacts. Other connections do not provide a power supply.
-
Can the W&H coupling be thermodisinfected and sterilized?
 Accessories
-
Prophy Angle Cups (1)
-
Can I use the W&H Proxeo Twist prophy angle cups more than once?
No, the Proxeo Twist prophy angle cups are single-use only.
-
Can I use the W&H Proxeo Twist prophy angle cups more than once?
-
Piezo Scaler Tips (5)
-
Are W&H tips (e.g. 1U) compatible with the new W&H high-speed mounting system?
No, they are not compatible because they have different threads.
-
How do I know which tip goes with which handpiece?
There are symbols on the tip, the tip changer and the handpiece identifying which system they belong to.
-
Are the new handpieces compatible with the PA-123/PA-115?
No, they are not compatible.
-
Can the tips and tip changers be prepared in the sterilizer?
Yes, as long as your handpiece or contra-angle handpiece carries the mark “sterilizable up to the stated temperature”.
-
Are the tips and tip changers thermo washer disinfectable?
Yes, as long as your handpiece or contra-angle handpiece carries the mark “thermo washer disinfectable”.
-
Are W&H tips (e.g. 1U) compatible with the new W&H high-speed mounting system?
-
Prophy Cups and Brushes (3)
-
Can I use the Proxeo Twist LatchShort Prophy cups and brushes multiple times?
No, the Proxeo Twist Prophy cups and brushes are single-use only.
-
Can I use my LatchShort Prophy cups and brushes with other contra-angle handpieces?
No, LatchShort Prophy cups and brushes are designed to be used only with the WP-66 W contra-angle handpiece.
-
Can I use the W&H Proxeo Twist LatchShort prophy cups in a contra-angle handpiece with a standard 2.35-mm chuck?
Due to the shorter shaft length of the W&H prophy cups, they cannot be gripped by a standard contra-angle handpiece chuck, so it is not possible to drive the W&H prophy cup.
-
Can I use the Proxeo Twist LatchShort Prophy cups and brushes multiple times?
-
Prophylaxis Powder (2)
-
Can I use the W&H prophylaxis powder for other air polishing handpieces?
This depends on the manufacturer’s specifications for the relevant air polishing handpiece/device.
-
Can I use any polishing powder available on the market in the Proxeo Aura air polishing handpiece?
The Proxeo Aura air polishing handpiece and the relevant powders were developed as a complete treatment system, in order to achieve the best possible treatment results and to ensure the reliability of the system. The use of other powders is not approved. This can lead to increased abrasiveness and risk of blockage or reduced efficiency.
-
Can I use the W&H prophylaxis powder for other air polishing handpieces?
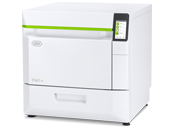 Cleaning & Disinfection Devices
-
Thed+/Thed (4)
-
Since I use a sterilizer in my office, why should I also use a thermal washer disinfector?
Thermal washer disinfectors and autoclaves are devices that cannot be missing in a modern workflow, as they perform different but at the same time absolutely complementary tasks. The main objective of a thermal washer disinfector is to clean all dental instruments in a thorough and validated manner, protecting operators from the risk of cross-infections and reducing the pathogenic load thanks to the thermodisinfection process. All these phases are absolutely preparatory in order to ensure that the subsequent sterilization phase can take place in ideal conditions.
-
If I use a thermo washer disinfector to reprocess the instruments, do I risk damaging them and having to replace them more frequently?
Absolutely not. On the contrary, the exact opposite is true. By using an automatic device, such as the thermal washer disinfector, I ensure the best possible cleaning standard for the instruments, validated and not subject to the randomness that derives from the human element represented by the operator, thus optimising the useful life of the instruments themselves.
-
Can I use accessories such as baskets, supports, etc., from my old thermal washer disinfector?
All manufacturers validate the washing effectiveness of their machines in combination with specially developed accessories. Therefore, neither final success nor validation is guaranteed when using accessories that have not been developed and validated by the manufacturer.
-
Why, after reprocessing the instruments in the thermal washer disinfector, did they oxidise or suffer surface discolouration?
Oxidation and/or discolouration phenomena are almost never directly attributable to the activity of the thermal washer disinfector; in most cases they are attributable to interactions between residues of chemical products on the instruments, possibly deriving from the previous decontamination process in a static tank, and the process chemicals of the thermal washer disinfector. In this regard, it is always advisable to rinse the instruments thoroughly before loading them into the thermal washer disinfector.
-
Since I use a sterilizer in my office, why should I also use a thermal washer disinfector?
-
U-Son (4)
-
How often do I need to change the cleaning solution?
The cleaning solution used in the ultrasonic cleaner must be replaced at least daily (or even more frequently if so indicated by the chemical manufacturer), and in any case whenever it is possible to find an evident deposit of residues on the bottom of the tank.
-
How can I assess whether my ultrasonic cleaner is working well?
There are various types of indicators on the market to verify the effectiveness of an ultrasonic device, however, the aluminium foil test remains, even today, among the most used due to its cost-effectiveness, practicality, speed and reliability.
-
Can I use the ultrasonic cleaner without the instrument basket?
It is not possible to use the device without the instrument basket as the instruments must never be in direct contact with the bottom of the tank, so as not to interfere with the emission of ultrasounds from the transducers.
-
Are there any instruments that cannot be reprocessed in an ultrasonic cleaner?
Handpieces should never be reprocessed in an ultrasonic device to avoid damaging the internal mechanisms. In general, we always remember to strictly follow the manufacturer’s instructions for maintaining the handpieces.
-
How often do I need to change the cleaning solution?
 Saw Handpieces

-
How to dismantle the handpiece
See detailed description in user manual or Video.
-
Can my W&H handpiece be processed via sterilizer?
Yes, providing that your W&H handpiece carries the relevant sterilization symbol.
 Implant stability measurement

-
Osstell Classic (3)
-
How does the measurement of the ISQ work?
> To measure the ISQ of an implant, you first screw a so called SmartPeg into the placed implant. The SmartPeg, with its magnet on top, works like a small tuning fork. The magnet on the SmartPeg is ‘hit’ with magnetic pulses, from the probe, which makes the SmartPeg vibrate. Due to the stiffness in the interface between the implant surface and the bone the SmartPeg will vibrate accordingly. The more dense the bone is the higher stability and the higher ISQ value.

-
Where can I buy the SmartPegs?
Please contact your local W&H partner
The sale of SmartPegs will be defined per country
The surgeon will receive 5 free SmartPegs. A voucher will be provided with the delivery of the product. -
What does ISQ stand for?
The abbreviation ISQ stands for Implant Stability Quotient. It is a value between 1 and 100 and gives the surgeon an insight of the implant stability after placing the implant. With the ISQ value the surgeon can monitor the osseointegration.
-
How does the measurement of the ISQ work?
-
Osstell Beacon (4)
-
How does the measurement of the ISQ work?
> To measure the ISQ of an implant, you first screw a so called SmartPeg into the placed implant. The SmartPeg, with its magnet on top, works like a small tuning fork. The magnet on the SmartPeg is ‘hit’ with magnetic pulses, from the probe, which makes the SmartPeg vibrate. Due to the stiffness in the interface between the implant surface and the bone the SmartPeg will vibrate accordingly. The more dense the bone is the higher stability and the higher ISQ value.
-
Where can I buy the SmartPegs?
Please contact your local W&H partner
The sale of SmartPegs will be defined per country
The surgeon will receive 5 free SmartPegs. A voucher will be provided with the delivery of the product. -
Is the ISQ scientifically proven?
The Osstell ISQ technology is proven by over 1400 scientific studies. These studies have shown, that torque and ISQ correlate.
-
What does ISQ stand for?
The abbreviation ISQ stands for Implant Stability Quotient. It is a value between 1 and 100 and gives the surgeon an insight of the implant stability after placing the implant. With the ISQ value the surgeon can monitor the osseointegration.
-
How does the measurement of the ISQ work?
 Air Scaler

-
Proxeo (1)
-
Can my W&H handpiece be processed via sterilizer?
Yes, providing that your W&H handpiece carries the relevant sterilization symbol.
-
Can my W&H handpiece be processed via sterilizer?
 Electric Motor

-
Electric Motor EM-11 L (10)
-
How can I integrate the EM-12 L electric motor into my unit as a Built-in version?
The EM-12 L electric motor can be integrated into a dental unit by selected dental unit manufacturers or their service technicians.
-
Can I sterilize my EM-12 L electric motor in a sterilizer?
Yes, if your EM-12 L electric motor features the symbol “Sterilizable up to the stated temperature”.
-
Does the electric motor need to be lubricated with oil?
No, the motor bearings require no maintenance. Any additional oil service would reduce the service life of the bearings.
-
Should I always call my W&H service partner in advance before sending devices/instruments in for repair?
If you are not completely sure of the cause of the problem, it is better to contact your W&H service partner first and speak to a technician. It is sometimes possible to resolve malfunctions together with the technician and decide what needs to be sent in for repair.
-
What is a brushless electric motor and what benefits does it offer me as a user?
The brushless electric motor is considerably less susceptible to wear than a brush motor, which in turn translates to minimised service and maintenance work. This also means less downtime for the user when servicing proves necessary.
-
How do I connect the EM-12 L electric motor to my unit as an Add-on?
To connect the EM-12 L electric motor to your dental unit as an Add-on you require a free turbine hose on your dental unit and the possibility of connecting the control to the mains via the included power supply unit. You can control the EM-12 L electric motor using the foot control of your dental unit.
-
Which contra-angle handpiece series is recommended for the EM-12 L electric motor?
The W&H Synea series – the glass rod elements are optimally suited for use together with the EM-12 L motor and its integrated LED+.
-
Does the Add-on version of the EM-12 L electric motor require maintenance?
The EM-12 L electric motor as an Add-on version including accessories requires a regular check once every three years unless shorter intervals are prescribed by law. The regular service must only be performed by an authorised W&H service partner. More detailed information on this topic can be found in the “Service” section of the instructions for use.
-
Does the Built-in version of the EM-12 L electric motor require maintenance?
The Built-in electronic component does not require separate maintenance. However, regular servicing together with the rest of the dental unit should be performed at the intervals prescribed by the pertinent legislation. This makes it possible to guarantee proper function and safety. More detailed information on this topic can be found in the “Service” section of the respective instructions for use.
-
Can my EM-12 L electric motor be reprocessed in a thermo washer disinfector?
No, that is not possible.
-
How can I integrate the EM-12 L electric motor into my unit as a Built-in version?
-
Electric Motor (EM-12 L) (10)
-
How can I integrate the EM-12 L electric motor into my unit as a Built-in version?
The EM-12 L electric motor can be integrated into a dental unit by selected dental unit manufacturers or their service technicians.
-
Can I sterilize my EM-12 L electric motor in a sterilizer?
Yes, if your EM-12 L electric motor features the symbol “Sterilizable up to the stated temperature”.
-
Does the electric motor need to be lubricated with oil?
No, the motor bearings require no maintenance. Any additional oil service would reduce the service life of the bearings.
-
Should I always call my W&H service partner in advance before sending devices/instruments in for repair?
If you are not completely sure of the cause of the problem, it is better to contact your W&H service partner first and speak to a technician. It is sometimes possible to resolve malfunctions together with the technician and decide what needs to be sent in for repair.
-
What is a brushless electric motor and what benefits does it offer me as a user?
The brushless electric motor is considerably less susceptible to wear than a brush motor, which in turn translates to minimised service and maintenance work. This also means less downtime for the user when servicing proves necessary.
-
How do I connect the EM-12 L electric motor to my unit as an Add-on?
To connect the EM-12 L electric motor to your dental unit as an Add-on you require a free turbine hose on your dental unit and the possibility of connecting the control to the mains via the included power supply unit. You can control the EM-12 L electric motor using the foot control of your dental unit.
-
Which contra-angle handpiece series is recommended for the EM-12 L electric motor?
The W&H Synea series – the glass rod elements are optimally suited for use together with the EM-12 L motor and its integrated LED+.
-
Does the Add-on version of the EM-12 L electric motor require maintenance?
The EM-12 L electric motor as an Add-on version including accessories requires a regular check once every three years unless shorter intervals are prescribed by law. The regular service must only be performed by an authorised W&H service partner. More detailed information on this topic can be found in the “Service” section of the instructions for use.
-
Does the Built-in version of the EM-12 L electric motor require maintenance?
The Built-in electronic component does not require separate maintenance. However, regular servicing together with the rest of the dental unit should be performed at the intervals prescribed by the pertinent legislation. This makes it possible to guarantee proper function and safety. More detailed information on this topic can be found in the “Service” section of the respective instructions for use.
-
Can my EM-12 L electric motor be reprocessed in a thermo washer disinfector?
No, that is not possible.
-
How can I integrate the EM-12 L electric motor into my unit as a Built-in version?
-
Electric Motor (EM-E6) (2)
-
I've got a micromotor without light. Do I have to change the micromotor and the contra-angle to have light?
No. You can purchase an Allegra LED G contra-angle which has its own light generator and a LED. No further investment necessary.
-
Does the electric motor need to be greased?
No, the motor bearings require no maintenance. Any additional greasing would reduce the service life of the bearings.
-
I've got a micromotor without light. Do I have to change the micromotor and the contra-angle to have light?
-
LED Upgrade Set (2)
-
I've got a micromotor without light. Do I have to change the micromotor and the contra-angle to have light?
No. You can purchase an Allegra LED G contra-angle which has its own light generator and a LED. No further investment necessary.
-
Does the electric motor need to be greased?
No, the motor bearings require no maintenance. Any additional greasing would reduce the service life of the bearings.
-
I've got a micromotor without light. Do I have to change the micromotor and the contra-angle to have light?
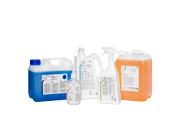 Cleaning & Disinfection Agents
-
BePro (5)
-
Are all pathogens equally resistant to disinfectants?
No, pathogens have very different resistances depending on the disinfectant substance used to try to eliminate them. The least resistant pathogens range from the encapsulated viruses up to mycobacteria, which are instead the most resistant and require a high level of disinfection to eliminate them.
-
Are there pathogens more resistant than mycobacteria?
Yes, the most difficult pathogens to eliminate are spores and prions, for to eliminate of which it is necessary to resort to the use of the autoclave for sterilization.
-
Are all disinfectants the same?
Disinfectants are not all the same, there are many different types based on their formulation and the active principle(s) contained therein.
-
How do I choose the right disinfectant for my practice?
Depending on the categories of pathogenic microorganisms on which the disinfectant is effective, different levels of disinfection are distinguished; high, intermediate and low. In order to ensure total safety in the practice, for both patients and operators, the choice of disinfectant to be used must always fall on a product that ensures a high level of disinfection.
-
What are the main aspects I have to consider when choosing a disinfectant?
There are three fundamental aspects that must always be considered when choosing a disinfectant: the desired efficacy, i.e. the ability of the product to be active on a wide range of pathogens, the expected efficiency, i.e. the ability of the product to reach its maximum effectiveness in the shortest possible time and, in the case of concentrated products, with the lowest possible concentration and finally the necessary compatibility, i.e. the possibility of using the product without the risk of damaging, destroying or invalidating its use of the tool or surface to be treated.
-
Are all pathogens equally resistant to disinfectants?
Accessories
-
Service Oil F1 (6)
-
Can I use any oil to lubricate my W&H instruments?
W&H recommends that W&H instruments are lubricated with W&H oil which has been designed and developed to enhance the performance of your W&H instrument.
-
Why is W&H oil better than other lubricants?
Extensive research and testing produced a formula which best covers the extreme demands of dental instruments. It consists of an all-synthetic special oil of the highest purity supplemented by the specially developed additive package.
-
Up to what maximum temperature is the oil stable without problems?
W&H Service Oil F1 has longterm stability between –30 oC and +160 oC.
-
Can W&H Service Oil F1 be sterilized?
Yes, W&H has checked the sterilizability precisely. W&H Service Oil F1 was not found to influence the sterilization of the instruments in any way.
-
Which aerosol is used in the W&H F1 spray can and what properties does it have?
A mixture of propane and butane (standard aerosol in all spray cans). It contains no CFCs and as such is environmentally-friendly.
-
How should I dispose of empty cans?
In accordance with the national regulations for aerosol cans. More information on disposal can be found on the safety datasheet.
-
Can I use any oil to lubricate my W&H instruments?
-
Seal2 (1)
-
Should I pouch/wrap my instruments and how long can I store them after sterilization?
To ensure that your instruments are stored in a sterile state from their successful sterilization until they are used, W&H recommends wrapping them in suitable sterile barrier systems before sterilization. The recommended storage period can be found in the recommendations of the wrapping material manufacturer. For further information, please contact your dealer.
-
Should I pouch/wrap my instruments and how long can I store them after sterilization?
 Straight & Contra-angle Handpieces

-
Synea (1)
-
Can my W&H handpiece be processed via sterilizer?
Yes, providing that your W&H handpiece carries the relevant sterilization symbol.
-
Can my W&H handpiece be processed via sterilizer?
-
Alegra (9)
-
Can the new Alegra instruments be connected to motors with a light supply?
Yes, the straight and contra-angle handpieces of the new Alegra range can be used on any motor with an ISO connection. .
-
Why does the WE-99 contra-angle handpiece have a transmission ratio of 1:4.5?
The optimum speed of fast-running burs can easily be achieved using the WE-99.
-
Can LED instruments with generator be sterilized?
Yes, W&H handpieces with LED and generator are both sterilizable and thermodisinfectable
 .
.
-
What are the advantages of the new Alegra instruments?
Compatible LED light – the instruments in the new Alegra range have LED light, which is supplied with energy by an integrated generator. The instruments are therefore independent of the light supply of the motor and the dental unit and offer the possibility of working with light compatible with any unit. The technology of the integrated generator means that there is only illumination when the instrument is running.
-
Can my W&H handpiece be processed via sterilizer?
Yes, providing that your W&H handpiece carries the relevant sterilization symbol.
-
For what reason may the LED fail to light up?
Because the energy for the LED light in the new Alegra instruments is generated by an integrated generator, the brightness of the LED depends on the motor speed (at least 9.000rpm).
-
Can the HE-43 E handpiece be employed in surgical applications?
The handpieces in the new Alegra range have been tested and approved for the following applications removing cariogenic materials, preparing cavities and crowns, removing fillings and finishing tooth and restoration surfaces. The use of the handpieces in other application areas is not permitted and the user bears all responsibility in cases where this instruction is disregarded.
-
Is more heat generated by the light source when LED technology is employed?
No, because they are usually operated with coolant air. In addition, the LED contra-angle handpieces are equipped with an internal spray function, which guarantees additional cooling.
-
What is the difference between the Alegra contra-angle handpieces WE-56 T and WE-56?
Alegra contra-angle handpieces designated with the letter "T" are significantly lighter in weight. Alegra contra-angle handpieces that are not designated with the letter "T" have been approved for automated thermo washer disinfection.
-
Can the new Alegra instruments be connected to motors with a light supply?
 Straight & Contra-angle Handpieces

-
Endea (1)
-
Can my W&H handpiece be processed via sterilizer?
Yes, providing that your W&H handpiece carries the relevant sterilization symbol.
-
Can my W&H handpiece be processed via sterilizer?
-
Endo NiTi (1)
-
Can my W&H handpiece be processed via sterilizer?
Yes, providing that your W&H handpiece carries the relevant sterilization symbol.
-
Can my W&H handpiece be processed via sterilizer?
-
Endea Endo Cursor (1)
-
Can my W&H handpiece be processed via sterilizer?
Yes, providing that your W&H handpiece carries the relevant sterilization symbol.
-
Can my W&H handpiece be processed via sterilizer?
 Straight & Contra-angle Handpieces

-
Contra-angles (10)
-
Which material is used at W&H surgical instruments?
Internal and external parts are of high quality stainless steel (including the contra-angle handpiece head).
-
Is the removable spray clip of my surgical hand piece sterilizable?
Yes. In order to extend the live span of the clip, W&H recommends to remove the clip from the hand piece and sterilize it separately (hand piece and clip in one pouch but separated).
-
What is the difference between WI-75 and WS-75?
Both assure maximum performance. The WS-75 can be dismantled and therefor it can be cleaned more thoroughly.
-
Can LED instruments with generator be sterilized?
Yes, W&H handpieces with LED and generator are both sterilizable and thermodisinfectable .
-
How to dismantle the handpiece
See detailed description in user manual or Video.
-
Can my W&H handpiece be processed via sterilizer?
Yes, providing that your W&H handpiece carries the relevant sterilization symbol.
-
Why doesn't the light on my LED G contra-angle handpiece work when I am positioning an implant?
The generator in the contra-angle handpiece requires at least 300 rpm to produce enough electricity for the LED. The rotary speed is between 15 and 50 rpm when positioning an implant.
-
Can our customers disassemble the contra-angles
Yes. At W&H the letter "S" always communicates, that the surgical contra-angle is disassemble. The letter "I" communicates, that the surgical contra-angle cannot be disassembled (e.g. WS-75 L vs. WI-75)
-
Can the contra-angles be attached to old motors?
No. In order to ensure optimal balance, we have shortened the inner coupling length. Therefore, contra-angle handpieces with only the “L” suffix cannot be attached to older motors, but only to EM-19 and EM-19 LC.
-
Can current contra-angles be attached to motors?
Yes. All W&H surgical contra-angles and handpieces can be attached to the motor EM-19.
-
Which material is used at W&H surgical instruments?
-
Handpieces (9)
-
Which material is used at W&H surgical instruments?
Internal and external parts are of high quality stainless steel (including the contra-angle handpiece head).
-
Can LED instruments with generator be sterilized?
Yes, W&H handpieces with LED and generator are both sterilizable and thermodisinfectable .
-
What is the minimum shaft lenght of the bur for the S-11?
The shaft of the bur should be at least 44mm long (ISO-shaft 104).
-
What is the minimum shaft lenght of the bur for the S-12?
The shaft of the bur should be at least 53mm long.
-
How to dismantle the handpiece
See detailed description in user manual or Video.
-
Can my W&H handpiece be processed via sterilizer?
Yes, providing that your W&H handpiece carries the relevant sterilization symbol.
-
Can our customers disassemble the contra-angles
Yes. At W&H the letter "S" always communicates, that the surgical contra-angle is disassemble. The letter "I" communicates, that the surgical contra-angle cannot be disassembled (e.g. WS-75 L vs. WI-75)
-
Can the contra-angles be attached to old motors?
No. In order to ensure optimal balance, we have shortened the inner coupling length. Therefore, contra-angle handpieces with only the “L” suffix cannot be attached to older motors, but only to EM-19 and EM-19 LC.
-
Can current contra-angles be attached to motors?
Yes. All W&H surgical contra-angles and handpieces can be attached to the motor EM-19.
-
Which material is used at W&H surgical instruments?
 Surgical Devices

-
Implantmed (24)
-
Can my Implantmed motor be processed via thermal washer disinfector?
Yes, if the thermal washer disinfector has a drying cycle and the motor bears the sign that it is "Thermo washer disinfectable".
-
Do I need a protection cap for the Implantmed/Elcomed motor?
No protection cap is needed.
-
Does my W&H unit need to be serviced.
Regular servicing of function and safety including the accessories is necessary and should be carried out at least once every three years, unless shorter intervals are prescribed by law. Detailed information can be found in the user manual at chapter "Servicing".
-
What types of tubing can I use on with my device?
For motors with a length of 1.8 m you can use single-use tubings (04363600) or sterilizable ones (0417XXX). For the combination of Implantmed and Piezomed module, we offer a tubing with a Y-valve (08072750). You also can find the appropriate tubings in the instructions for use of the device.
-
How can the unit / motor be cleaned / sterilized?
Please find a detailed description in the user manual at chapter "Hygiene and Maintenance".
-
Can handpieces from another manufacturer be used on a W&H surgical motor (implantmed)?
For applications which do not require accurate torque (drilling, grinding,…), any handpiece with ISO 3964 connection can be used. Please be informed that hand pieces from other manufacturers might not be able to handle the torque of your unit/motor and therefore might get damaged.
-
Can other brands of tubing be used?
No, only W&H-approved irrigation tubings are permitted. This is due to specifications (material, dimensions, coolant flow), which could cause problems like leakage, insufficient cooling, or even damage to the device.
-
How to insert irrigation tube?
Please find a detailed description in the user manual at chapter "Starting operation - General".
-
Is it possible to adjust the motor speed with the implant insertion program?
Yes, the torque as well as the speed can be set for implant insertion.
-
Why doesn't the light on my LED G contra-angle handpiece work when I am positioning an implant?
The generator in the contra-angle handpiece requires at least 300 rpm to produce enough electricity for the LED. The rotary speed is between 15 and 50 rpm when positioning an implant.
-
Does the motor need to be greased?
No, the Implantmed/Elcomed motor does not need greasing. The motor bearings require no maintenance. Any additional greasing would reduce the service life of the bearings.
-
What’s the difference between torque and ISQ?
Torque is a one time, static measurement at the time of placement of the implant and cannot be repeated later on in a non-invasive way. Osstell ISQ measures the lateral stability of the implant and the measurements can be repeated in a non-invasive, dynamic way to monitor the development of osseointegration.
-
Can Implantmed devices be retrofitted with the wireless foot control?
Implantmed Plus devices can be retrofitted. Simply plug the supplied dongle into the device and operate it using the wireless foot control. For Implantmed Plus II devices, you must decide whether you want a wireless or wired device version when purchasing. Retrofitting is not possible.
-
Are old cable foot controls compatible with the new unit or vice versa?
See overview table.
Foot control Implantmed Classic SI-9xx /Implantmed Plus SI-10xx Implantmed Plus II SI-2102 Implantmed Plus II SI-2101 Implantmed Plus II SI-2100 S-NW3 wireless foot control no yes yes no Wired foot control S-N3 no no no yes Foot controls S-N2 / S-NW yes no no no -
Can our customers disassemble the contra-angles
Yes. At W&H the letter "S" always communicates, that the surgical contra-angle is disassemble. The letter "I" communicates, that the surgical contra-angle cannot be disassembled (e.g. WS-75 L vs. WI-75)
-
Can the contra-angles be attached to old motors?
No. In order to ensure optimal balance, we have shortened the inner coupling length. Therefore, contra-angle handpieces with only the “L” suffix cannot be attached to older motors, but only to EM-19 and EM-19 LC.
-
Can current contra-angles be attached to motors?
Yes. All W&H surgical contra-angles and handpieces can be attached to the motor EM-19.
-
What does the LC in EM-19 LC stand for, is there a LED in the motor?
The LC stands for light contacts. This means that we have integrated an electrical connection into our new motors. The light contacts supply our contra-angle handpieces with the “L” suffix (e.g. WS-75 L) with power, thus providing optimal light at any speed.
-
Is every Implantmed compatible with the W&H Osstell ISQ module?
Implantmed Plus control units SI-1023, SI-1015 and SI-1010 can be upgraded with the W&H Osstell ISQ module. For the new generation of Implantmed Plus II the Osstell Beacon can be connected.
-
Which motors are compatible with which Implantmed devices?
See overview table.
Motor Implantmed ClassicSI-9xx Implantmed PlusSI-10xx Implantmed Plus IISI-21xx EM-19 yes yes no EM-19 LC no yes yes Older motor versions no no no -
Is it possible to use the Implantmed Classic in combination with the wireless foot control?
No, the Implatmed Classic can only be operated via a wired foot control.
-
Piezomed module: are the handpieces of the modules SA-40 and SA-40 L compatible with the Piezomed device SA-320?
No, they are not compatible.
-
Piezomed module: can devices be retrofitted on the market?
Yes, devices can be retrofitted by users. The following combinations are possible: Implantmed Plus with Piezomed Plus module or Piezomed Classic module. Implantmed Plus II with Piezomed Module Plus II.
-
Piezomed module: Does the module also work with OEM devices?
Yes, but different software updates are necessary.
-
Can my Implantmed motor be processed via thermal washer disinfector?
-
Piezomed (13)
-
How long do the instruments last and when should they be replaced?
The useful service life of the instruments is determined by the length of time they are used reprocessing and sterilization cycles have only marginal influence.
a. Instruments need to be replaced
- If there is a loss of power while working
- Where there is visible damage on the working part or the shank of the instrument.
b. Saws must be replaced if
- Teeth are broken off
- Teeth are worn
c. Diamond-coated instruments must be replaced
- As soon as the diamond coating is worn
-
How long is the useful service life of the LED?
The user must replace the LED socket as soon as the protective coating on the LED discolours and the luminous power is impaired as a result. The length of time this takes can differ depending on the type of steriliser or sterilization process.
-
Is it necessary for the torque driver to engage audibly when tightening the instrument?
Yes, it must engage audibly once, as otherwise the required torque is not achieved.
-
Can Piezomed instruments also be used on third-party devices?
No
a. Different thread
b. Third-party device cannot find the correct resonance point – instrument fails to oscillate -
Can third-party instruments be used on the Piezomed or Piezomed modules?
No
a. Different thread
b. The Piezomed instrument detection cannot detect third-party instruments
-
How are the instruments prepared for cleaning?
a. Preparation in the ultrasonic bath:
- Place the instruments in the instrument tray and lower into the ultrasonic bath.
- Use cleaning agents and disinfectants suitable for hand instruments (probes, mirrors, forceps, etc.).
DO NOT USE a bur bath, as this is very aggressive.
- After cleaning in the ultrasonic bath, rinse adequately with water to remove any remnants of the cleaning agent and disinfectant from the coolant channels.
- Blow dry with compressed air after rinsing
- Replace dried instruments in the instrument tray and package for sterilization
b. Mechanical preparation in the cleaning unit and disinfector
- Use the cleaning adapter for cleaning units and disinfectors (see Instructions for Use – Accessories)
- After preparation in the cleaning unit and disinfector, check that the coolant channels are dry and, if necessary, dry again with compressed air. -
How long is the useful service life of the instrument detection?
The instrument detection is located in the LED socket and is automatically replaced at the same time as the LED socket.
-
Piezomed module: are the handpieces of the modules SA-40 and SA-40 L compatible with the Piezomed device SA-320?
No, they are not compatible.
-
Piezomed module: can devices be retrofitted on the market?
Yes, devices can be retrofitted by users. The following combinations are possible: Implantmed Plus with Piezomed Plus module or Piezomed Classic module. Implantmed Plus II with Piezomed Module Plus II.
-
Piezomed module: Does the module also work with OEM devices?
Yes, but different software updates are necessary.
-
Piezomed module: Compatibility of the handpieces with Piezomed module Plus II, Piezomed module Plus
and Piezomed Classic module.
Handpieces Piezomed module Plus II Piezomed module Plus Piezomed Classic module SA-40 yes yes yes SA-40 L (light version) yes yes no SA-320 no no no -
Piezomed module: What are the main differences between the Piezomed Plus module
and Piezomed Classic module?
Features Piezomed Plus module Piezomed Classic module Power 24 watts 18 watts Light LED no light Tip detection yes no Colour black white Cable length 1.8 m and 3.5 m 1.8 m -
Can the SA-40 be used with the Piezomed Module Plus II?
Yes, but automatic instrument detection must be deactivated in the submenu. Settings such as power group, power, and coolant flow must be set by the user according to the instrument card (included with every W&H piezo instrument).
-
How long do the instruments last and when should they be replaced?
-
Implantmed Plus II (29)
-
Do I need a protection cap for the Implantmed/Elcomed motor?
No protection cap is needed.
-
What types of tubing can I use on with my device?
For motors with a length of 1.8 m you can use single-use tubings (04363600) or sterilizable ones (0417XXX). For the combination of Implantmed and Piezomed module, we offer a tubing with a Y-valve (08072750). You also can find the appropriate tubings in the instructions for use of the device.
-
Can other brands of tubing be used?
No, only W&H-approved irrigation tubings are permitted. This is due to specifications (material, dimensions, coolant flow), which could cause problems like leakage, insufficient cooling, or even damage to the device.
-
Is it possible to adjust the motor speed with the implant insertion program?
Yes, the torque as well as the speed can be set for implant insertion.
-
Can Implantmed devices be retrofitted with the wireless foot control?
Implantmed Plus devices can be retrofitted. Simply plug the supplied dongle into the device and operate it using the wireless foot control. For Implantmed Plus II devices, you must decide whether you want a wireless or wired device version when purchasing. Retrofitting is not possible.
-
Are old cable foot controls compatible with the new unit or vice versa?
See overview table.
Foot control Implantmed Classic SI-9xx /Implantmed Plus SI-10xx Implantmed Plus II SI-2102 Implantmed Plus II SI-2101 Implantmed Plus II SI-2100 S-NW3 wireless foot control no yes yes no Wired foot control S-N3 no no no yes Foot controls S-N2 / S-NW yes no no no -
Can our customers disassemble the contra-angles
Yes. At W&H the letter "S" always communicates, that the surgical contra-angle is disassemble. The letter "I" communicates, that the surgical contra-angle cannot be disassembled (e.g. WS-75 L vs. WI-75)
-
Can the contra-angles be attached to old motors?
No. In order to ensure optimal balance, we have shortened the inner coupling length. Therefore, contra-angle handpieces with only the “L” suffix cannot be attached to older motors, but only to EM-19 and EM-19 LC.
-
Can current contra-angles be attached to motors?
Yes. All W&H surgical contra-angles and handpieces can be attached to the motor EM-19.
-
What does the LC in EM-19 LC stand for, is there a LED in the motor?
The LC stands for light contacts. This means that we have integrated an electrical connection into our new motors. The light contacts supply our contra-angle handpieces with the “L” suffix (e.g. WS-75 L) with power, thus providing optimal light at any speed.
-
Is every Implantmed compatible with the W&H Osstell ISQ module?
Implantmed Plus control units SI-1023, SI-1015 and SI-1010 can be upgraded with the W&H Osstell ISQ module. For the new generation of Implantmed Plus II the Osstell Beacon can be connected.
-
Which motors are compatible with which Implantmed devices?
See overview table.
Motor Implantmed ClassicSI-9xx Implantmed PlusSI-10xx Implantmed Plus IISI-21xx EM-19 yes yes no EM-19 LC no yes yes Older motor versions no no no -
Is it possible to use the Implantmed Classic in combination with the wireless foot control?
No, the Implatmed Classic can only be operated via a wired foot control.
-
Piezomed module: are the handpieces of the modules SA-40 and SA-40 L compatible with the Piezomed device SA-320?
No, they are not compatible.
-
Piezomed module: can devices be retrofitted on the market?
Yes, devices can be retrofitted by users. The following combinations are possible: Implantmed Plus with Piezomed Plus module or Piezomed Classic module. Implantmed Plus II with Piezomed Module Plus II.
-
Will the implants I use be detected during scanning?
All medical devices with a valid code are displayed on the screen after scanning. When connected to ioDent®, the materials are displayed in plain text (name, serial number, etc.) in the patient documentation.
-
Can I connect the Implantmed Plus II to my practice Wi-Fi?
Yes, the device supports any encrypted 2.4GHz Wi-Fi network.
-
Can I connect the Osstell Beacon to the Implantmed Plus II?
Yes, the Osstell Beacon can be connected via a USB-A/USB-C adaptor.
-
Can I update my Implantmed Plus II software later?
Yes, simply create an ioDent® account and connect your device to it. You will then be shown available software updates for your device.
-
Do I need a connection to ioDent® to use Implantmed Plus II?
No, not for basic use of the device. However, connecting to ioDent® offers additional features. For example, users can then perform software updates themselves.
-
Which codes can be scanned?
DataMatrix codes. They contain structured product information in accordance with the MDR and are standard for medical devices.
-
Can QR codes and barcodes be scanned?
No. QR codes and barcodes cannot be scanned.
-
Can I integrate my existing SICAT Implant installation into ioDent®?
Yes, integration with SICAT Implant 2.0 is generally possible. Only the licence key needs to be verified.
-
Can I use my Galileos implant software (a proprietary software package of SICAT implant) for integration with ioDent®?
Yes, but an update is required.
-
Can I see in SICAT portal when ioDent® is connected?
Yes, in the SICAT portal under: Profile > Account Settings > External Connections
-
Where can I download SICAT Implant/SICAT Suite?
You can download the product here https://www.sicat.com/wh, using the voucher code included with every Implantmed.
-
Are protocols available in ioDent® for all implants offered in SICAT?
No, we have more than 10 manufacturers and are working on integrating additional implant manufacturers.
-
What happens if I define an implant that can be planned in SICAT Implant, but there is no corresponding protocol in ioDent®?
In ioDent® you will be informed that the protocol is not available and that the standard Implantmed protocol is also set for the treatment.
-
What are the main advantages of SICAT Implant software?
For questions regarding SICAT itself, please contact SICAT colleagues who will answer specific questions. Detailed how-to videos are provided in the ecademy.sicat.com. In general, SICAT enlarges the advantages of planning and treatment with rapid digital guidance.
-
Do I need a protection cap for the Implantmed/Elcomed motor?
-
Piezomed module Plus II (6)
-
Can third-party instruments be used on the Piezomed or Piezomed modules?
No
a. Different thread
b. The Piezomed instrument detection cannot detect third-party instruments
-
Piezomed module: are the handpieces of the modules SA-40 and SA-40 L compatible with the Piezomed device SA-320?
No, they are not compatible.
-
Piezomed module: can devices be retrofitted on the market?
Yes, devices can be retrofitted by users. The following combinations are possible: Implantmed Plus with Piezomed Plus module or Piezomed Classic module. Implantmed Plus II with Piezomed Module Plus II.
-
Piezomed module: Compatibility of the handpieces with Piezomed module Plus II, Piezomed module Plus
and Piezomed Classic module.
Handpieces Piezomed module Plus II Piezomed module Plus Piezomed Classic module SA-40 yes yes yes SA-40 L (light version) yes yes no SA-320 no no no -
Can the SA-40 be used with the Piezomed Module Plus II?
Yes, but automatic instrument detection must be deactivated in the submenu. Settings such as power group, power, and coolant flow must be set by the user according to the instrument card (included with every W&H piezo instrument).
-
How do I connect the Piezomed Module Plus II to the Implantmed Plus II?
Simply remove the side cover from the device and slide the module in from the rear until it clicks into place. No additional cable is required.
-
Can third-party instruments be used on the Piezomed or Piezomed modules?
 Turbines

-
Synea (10)
-
I've just bought a new W&H turbine? Should I call a serviceman for my unit to install it?
Yes, it is neccesary to properly adjust the air/water pressure and if applicable the voltage for the turbine.
-
At the moment I have a W&H turbine without light. How can I have light in my dental turbine?
If there is electricity at the end of turbine hose, you need a proper coupling and a turbine with light (example: RQ-24 and TK-97 L). If no electricity is available, the simplest way is to buy a W&H Alegra turbine with LED and its Roto Quick coupling (e.g.: TE-97 LQ and RQ-54). It doesn't require any other investment in the dental unit.
-
What is the maximum length of the rotary instruments?
25 mm for the standard turbine (XX-98 modells) and 21 mm for turbines with small head (XX-97 modells). When using longer rotary instruments the user must ensure by correct selection of the operating conditions, that there is no danger to the user, patient or third parties.
-
Is the new LED turbine from the Synea series e.g. compatible with the existing 924 couplings?
Yes, the new generation of turbines can be operated with both the existing and the new couplings.
-
My dental turbine doesn't have enough power/speed?
Please check drive air pressure on your unit and maintenance of the instruments (Synea with RQ connection = 3 +/- 0,3 bar, with Multiflex® connection 2,5 - 4 bar). For all Alegra turbines the pressure needs to be set between 2,5 - 2,8 bar.
-
Can my W&H turbine be processed via sterilizer?
Yes, providing that your W&H turbine carries the relevant sterilization symbol.
-
Can my W&H turbine be processed via thermal disinfector?
Yes, providing that your W&H turbine carries the relevant thermal disinfection symbol and the thermo disinfector should have a drying cycle.
-
Which burs can be used with W&H turbines?
Turbines with standard head sizes (models XX-98): 19 mm - 25 mm Turbines with small head sizes (models XX-97): 16 mm - 21 mm
The cutting part diameter for both head sizes is restricted to max. 2 mm. Please observe the technical data provided by the bur manufacturer. When using longer, rotary instruments for special treatment indications, the user must always select the operating conditions correctly in order to avoid placing the user, patient or anybody else at risk. -
How does the new W&H Click & Pull system work? How do I remove a dental turbine?
Use your thumb and index finger to retract the coupling's retention sleeve. The turbine can now be removed from the coupling without any problems. Pulling forcefully on the dental turbine can cause damage. If excessive force is required to remove the turbine, verify that the retention sleeve on the coupling can be moved without any problems.
-
Why is a 6-hole connection required for the use of an LED turbine?
A 6-hole connection for the turbine tubing is necessary to supply the turbine with electricity via electrical contacts. Other connections do not provide a power supply.
-
I've just bought a new W&H turbine? Should I call a serviceman for my unit to install it?
-
Primea (18)
-
How does the Roto Quick coupling's W&H Click & Pull System work? How do I remove a Primea Advanced Air Turbine?
Pull the retention sleeve of the Roto Quick coupling back. The turbine can now be easily removed from the Roto Quick coupling. Forcefully pulling the Primea Advanced Air Turbine may cause damage. If excessive force is required to remove the turbine, make sure that the retention sleeve of the Roto Quick coupling can be moved without any problems.
-
What is the maximum rotary instrument length approved by W&H for Primea Advanced Air Turbines?
Primea Advanced Air Turbines with small heads (Model RG-/RK-97 L): 16 mm to 21 mm
-
Which speed setting should I use on the Primea Advanced Air System?
Within the adjustable speed range of 60,000 to 320,000 revolutions, you can set the maximum permitted speed for the respective rotary instrument as specified by the manufacturer.
-
Which rotary instruments can be used with Primea Advanced Air Turbines?
Primea Advanced Air Turbines with small heads (Model RG-/RK--97 L): 16 mm to 21 mm The diameter of the working part is limited to a maximum of 2 mm. Follow the operating instructions of the manufacturer. When using longer or shorter rotary instruments the user must ensure by correct selection of the operating conditions, that there is no danger to the user, patient or third parties.
-
What do I do if my Primea Advanced Air Turbine does not achieve sufficient power/speed?
Please contact your authorized W&H service partner to check the Primea Advanced Air System.
-
Should I always call my authorized W&H service partner first before I send devices/instruments for repair?
If you are unsure of the cause of a problem, it is better to contact your authorized W&H service partner first and talk to a service technician. Together with the service technician, malfunctions may be resolved or it may be determined which items should be sent for repair.
-
How do I connect the Primea Advanced Air Add-on to my unit?
You can connect the external Primea Advanced Air System to the dental unit. To do this, you need a spare supply hose for your dental unit, a minimum operating pressure of 5 bar and the possibility to connect the control system to the mains power supply. Please contact an authorized W&H service partner to check the inlet pressure of the additional air supply hose.
-
How can I integrate the Primea Advanced Air Built-in into my unit?
The Primea Advanced Air System is integrated into a dental unit by selected dental unit manufacturers or their service technicians.
-
Are there different Primea Advanced Air Turbines?
Yes, the RG-97 L is equipped with an LED to illuminate the treatment area. The RK-97 L offers you shadowless illumination of the treatment site thanks to 5x Ring LED+. Both turbines have a mini-head and five spray ports, as well as a scratch-proof surface coating.
-
In which versions can I purchase the Primea Advanced Air System? What are my installation options?
W&H can offer you the Primea Advanced Air System as an external add-on which you can connect to your dental unit. To do this, you need a spare supply hose for your dental unit, a minimum operating pressure of 5 bar and the possibility to connect the control system to the mains power supply. Please contact your authorized W&H service partner to check the inlet pressure of the additional air supply hose. The Primea Advanced Air Built-in System is integrated into a dental unit by selected dental unit manufacturers or their service technicians.
-
I have just purchased a new W&H Primea Advanced Air Turbine. How can I activate it?
It is not sufficient to purchase the Primea Advanced Air Turbine alone. In order to be able to operate it, you need the entire Primea Advanced Air System – consisting of a turbine, control system, user interface (UI) and the supply hose with Roto Quick coupling. You can add this as an add-on or built-in solution to/in your dental unit.
-
Can my Primea Advanced Air Turbine be prepared in a thermo washer disinfector?
Yes, if your Primea Advanced Air Turbine is labelled with the symbol "thermo washer disinfectable".
-
Can my Primea Advanced Air Turbine be sterilized in a sterilizer?
Yes, if your Primea Advanced Air Turbine is labelled with the symbol "Sterilizable up to the stated temperature".
-
What features do the two operating modes "Power" and "Tactile" offer?
In "Power" mode, the set speed is also constantly maintained when pressure mounts on the rotary instrument, which translates to a higher removal rate. The "Tactile" mode permits a reduction in the removal rate when pressure mounts on the rotary instrument.
-
Can turbines from other manufacturers be operated in a Primea Advanced Air System?
This is possible. In order to operate standard turbines (from W&H and other manufacturers), the control system of the Primea Advanced Air System can be changed over to standard turbines mode. Turbines which can be connected to the standard 6-hole connection are then operated with a constant 3 bar operating pressure.
-
Does the Primea Advanced Air Add-on need to be serviced?
Regular servicing of the Primea Advanced Air Add-on including the accessories should be carried out at least once every three years, unless shorter intervals are prescribed by law. The regular service must only be performed by an authorised W&H service partner. For details, see the chapter "Service" in the respective instructions for Use.
-
Does the Primea Advanced Air Built-in need to be serviced?
The built-in electronic components do not need to be serviced separately. However, regular servicing should be carried out together with the dental unit at the legally required intervals. This will ensure the proper functioning and safety of the components. For details, see the chapter "Service" in the respective instructions for Use.
-
How is the Primea Advanced Air System cleaned? How is it prepared?
For detailed instructions, see the chapter "Hygiene and maintenance" in the respective instructions for Use.
-
How does the Roto Quick coupling's W&H Click & Pull System work? How do I remove a Primea Advanced Air Turbine?
-
Alegra (10)
-
I've just bought a new W&H turbine? Should I call a serviceman for my unit to install it?
Yes, it is neccesary to properly adjust the air/water pressure and if applicable the voltage for the turbine.
-
At the moment I have a W&H turbine without light. How can I have light in my dental turbine?
If there is electricity at the end of turbine hose, you need a proper coupling and a turbine with light (example: RQ-24 and TK-97 L). If no electricity is available, the simplest way is to buy a W&H Alegra turbine with LED and its Roto Quick coupling (e.g.: TE-97 LQ and RQ-54). It doesn't require any other investment in the dental unit.
-
What is the maximum length of the rotary instruments?
25 mm for the standard turbine (XX-98 modells) and 21 mm for turbines with small head (XX-97 modells). When using longer rotary instruments the user must ensure by correct selection of the operating conditions, that there is no danger to the user, patient or third parties.
-
My dental turbine doesn't have enough power/speed?
Please check drive air pressure on your unit and maintenance of the instruments (Synea with RQ connection = 3 +/- 0,3 bar, with Multiflex® connection 2,5 - 4 bar). For all Alegra turbines the pressure needs to be set between 2,5 - 2,8 bar.
-
Can my W&H turbine be processed via sterilizer?
Yes, providing that your W&H turbine carries the relevant sterilization symbol.
-
Can my W&H turbine be processed via thermal disinfector?
Yes, providing that your W&H turbine carries the relevant thermal disinfection symbol and the thermo disinfector should have a drying cycle.
-
Which burs can be used with W&H turbines?
Turbines with standard head sizes (models XX-98): 19 mm - 25 mm Turbines with small head sizes (models XX-97): 16 mm - 21 mm
The cutting part diameter for both head sizes is restricted to max. 2 mm. Please observe the technical data provided by the bur manufacturer. When using longer, rotary instruments for special treatment indications, the user must always select the operating conditions correctly in order to avoid placing the user, patient or anybody else at risk. -
How does the new W&H Click & Pull system work? How do I remove a dental turbine?
Use your thumb and index finger to retract the coupling's retention sleeve. The turbine can now be removed from the coupling without any problems. Pulling forcefully on the dental turbine can cause damage. If excessive force is required to remove the turbine, verify that the retention sleeve on the coupling can be moved without any problems.
-
Does the Alegra turbine handpiece also product light when used on optic dental units?
Alegra LED turbine handpieces are exclusively intended for use with Roto Quick couplings RQ-54 / RQ-53. Alegra LED turbine handpieces cannot be coupled onto Roto Quick couplings RQ-24 / RQ-34.
-
I have a new Alegra LED turbine handpiece, which is supplied with power by a Roto Quick coupling with integrated generator.
What should I pay attention to when servicing the Roto Quick coupling with generator?
The generator in the coupling is equipped with ball bearings, which must be lubricated once a month. This sufficiently removes any soiling from the generator.
-
I've just bought a new W&H turbine? Should I call a serviceman for my unit to install it?
Accessories
-
SmartPeg (16)
-
How many times can the SmartPeg be used?
The reusable SmartPeg can be used for up to 20 reprocessing cycles, as long as its integrity and performance are maintained. If inspection reveals wear, deformation, corrosion, damaged threads, or any loss of functional compatibility, the SmartPeg must be discarded, even if it has been processed fewer than 20 times. The single-use SmartPeg is intended for one treatment session only and must not be reprocessed.
-
How often can the SmartPeg be used?
The reusable SmartPeg can be reused up to 20 reprocessing cycles, as long as its integrity and performance are maintained. If inspection reveals wear, deformation, corrosion, damaged threads, or any loss of functional compatibility, the SmartPeg must be disposed of, even if it has been processed fewer than 20 times.
-
Can I combine single-use and reusable SmartPegs in the same treatment session?
Yes. You can combine single-use and reusable SmartPegs in the same treatment session. The only requirement is that you use the correct SmartPeg type number for the specific implant or abutment you are measuring. Whether the SmartPeg is intended for single-use or reuse does not affect the measurement.
-
Why can the reusable SmartPeg be cleaned and sterilized, but the single-use SmartPeg cannot, even though both are made of aluminium?
The reusable SmartPeg features a special protective surface coating – one on the SmartPeg body and another black protective coating on the magnet. These coatings provide resistance to moisture, cleaning agents, wear, and corrosion, ensuring that the SmartPeg maintains its performance throughout the validated number of reprocessing cycles.
-
Does a reusable SmartPeg provide the same ISQ values as a single use SmartPeg?
Yes. Osstell is also the only company offering both a sterile single-use and a reusable SmartPeg made of aluminium, supported by more than 1,500 published studies on the ISQ method. With the Osstell original ISQ scale and SmartPegs, no conversion tables or correction factors are needed. The measured ISQ value is the true value, regardless of whether you use a single-use or a reusable SmartPeg.
-
Is there a visual difference between the single-use and reusable SmartPeg?
Yes. The reusable and single use SmartPegs are designed to be easily distinguishable:
• The single-use SmartPeg is supplied sterile, has an aluminium coloured (non contrasting) magnet, and does not have any laser marked identifiers.
• The reusable SmartPeg has a black magnet on top and carries laser marked type and LOT numbers for identification and traceability. -
How are the different SmartPegs packed?
SmartPegs are available in different packaging formats depending on whether they are single-use or reusable: Single-use SmartPegs • Delivered sterile. • Supplied in packs of 5 pieces, in a single sterile barrier system with protective outer packaging. • Intended for one treatment session only and must not be reused. Reusable SmartPegs • Delivered non-sterile in individual packaging. • Must be cleaned, disinfected and sterilized before the first clinical use and after each subsequent use (see IFU).
-
Are there any studies that prove the Osstell method?
There are currently thousands of scientific publications in which Osstell has been used as part of the study protocol. These abstracts can be explored through our searchable database under Osstell.com/scientific-database. In all these studies, Osstell SmartPegs – made of aluminium – have been used, providing the consistent and validated measurement standard upon which the ISQ evidence base is built.
-
Why is the Osstell ISQ scale important?
The Osstell ISQ scale is important because it provides precise insights into the progress of osseointegration, helping clinicians determine the optimal timing for prosthetic loading and ensuring a safe surgical protocol.
-
Why do I have to take two measurements at the same occasion?
ISQ should always be measured in two directions, as implant stability can vary depending on the amount of surrounding bone. Measuring from two angles ensures that both the most and the least stable directions are captured. To do this, take one measurement in the buccal-lingual direction and one in the mesial-distal direction. These two ISQ values represent the different stability directions. Sometimes the values are identical; sometimes they differ. If the two measurements differ, always rely on the lowest ISQ value, as it reflects the weakest direction and therefore provides the most clinically relevant information about implant stability.
-
How do I measure and record ISQ at an abutment?
You can measure and record ISQ at abutment level in OsstellConnect. However, it is important to follow the correct clinical measurement procedure to obtain accurate values. How to measure ISQ at abutment level
1. Perform an implant level measurement first, before placing the abutment.
2. Measure again at abutment level during the same session, using a SmartPeg made for abutment level measuring.
3. Determine the offset by noting the difference between implant level and abutment level ISQ. This offset remains stable throughout the healing phase and should be considered when interpreting follow-up measurements.
4. At all subsequent appointments, measure on the abutment and apply the same offset to determine the true implant ISQ.
How to record the measurement in OsstellConnect
1. Access patient record, select the patient and the implant in the tooth chart. Click ‘Add abutment’, select the abutment, and save the data.
2. Select ‘Measure stability’ and choose ‘Abutment’, under Measurement level. Measure on the abutment as you would at implant level, and save.
3. To check the stability progression, open the Stability tab and toggle ‘Show abutment’. You can also enable ‘Show details’ to view buccal–lingual and mesial–distal ISQ values. For a more detailed explanation and clinical guidance, see our blog post here: https://www.osstell.com/blog/measuring-dental-implant-stability-at-the-abutment-level/ -
Why do I get unexpected values or no measurements at all?
Several factors may lead to unexpected ISQ values or failure to obtain a reading:
1. Incorrect use or condition of the SmartPeg
• Single-use SmartPegs: These are intended for one treatment session and one patient only. Reusing a single use SmartPeg may lead to worn threads and unreliable measurements.
• Reusable SmartPegs: Ensue properly cleaning, inspection, and that they are not damaged. Wear, deformation or contamination can affect performance.
2. Wrong SmartPeg type selected
Make sure you have selected the correct SmartPeg for the specific implant system and connection. See SmartPeg Reference Guide: osstell.com/smartpegguide 3. Tissue or debris in the implant connection
Bone fragments, soft tissue or fluid between the implant interface and the SmartPeg can prevent proper seating. Clean the implant prosthetic connection thoroughly before attaching the SmartPeg.
4. Electromagnetic interference Nearby sources of electromagnetic disturbance may disrupt the measurement. If possible, remove or switch off the source of interference.
5. Incorrect probe positioning Hold the instrument tip 2–4 mm away from the SmartPeg and align it correctly towards the top of the peg. Do not touch the magnet. -
Does using the Osstell measuring device affect the implant?
No. The Osstell measurement does not affect the implant. The measuring device only makes the SmartPeg vibrate. The SmartPeg’s magnet is activated by very low magnetic pulses generated by the device. The technique is objective, gentle, and highly reproducible.
-
How do I select the correct SmartPeg for my implant?
Different implants require specific SmartPegs to ensure accurate measurement. Each SmartPeg is matched to a particular implant system and connection type. You can find the correct SmartPeg for your implant in the SmartPeg Reference Guide – click here to access it. (https://osstell.com/osstellconnect/)
-
Can the reusable SmartPeg be sterilised according to the Prion cycle?
Yes, it can be sterilised with a Prion cycle at 134 °C for 18 minutes.
-
How should the reusable SmartPeg and the SmartPeg Mount be cleaned and sterilized?
Prior to the first clinical use, and after each use the reusable products must be cleaned, disinfected and sterilized according to the instructions in the quickguide that is found here: https://osstell.com/ifu
-
How many times can the SmartPeg be used?
-
Piezomed Instruments (6)
-
How long do the instruments last and when should they be replaced?
The useful service life of the instruments is determined by the length of time they are used reprocessing and sterilization cycles have only marginal influence.
a. Instruments need to be replaced
- If there is a loss of power while working
- Where there is visible damage on the working part or the shank of the instrument.
b. Saws must be replaced if
- Teeth are broken off
- Teeth are worn
c. Diamond-coated instruments must be replaced
- As soon as the diamond coating is worn
-
Is it necessary for the torque driver to engage audibly when tightening the instrument?
Yes, it must engage audibly once, as otherwise the required torque is not achieved.
-
Can Piezomed instruments also be used on third-party devices?
No
a. Different thread
b. Third-party device cannot find the correct resonance point – instrument fails to oscillate -
Can third-party instruments be used on the Piezomed or Piezomed modules?
No
a. Different thread
b. The Piezomed instrument detection cannot detect third-party instruments
-
How are the instruments prepared for cleaning?
a. Preparation in the ultrasonic bath:
- Place the instruments in the instrument tray and lower into the ultrasonic bath.
- Use cleaning agents and disinfectants suitable for hand instruments (probes, mirrors, forceps, etc.).
DO NOT USE a bur bath, as this is very aggressive.
- After cleaning in the ultrasonic bath, rinse adequately with water to remove any remnants of the cleaning agent and disinfectant from the coolant channels.
- Blow dry with compressed air after rinsing
- Replace dried instruments in the instrument tray and package for sterilization
b. Mechanical preparation in the cleaning unit and disinfector
- Use the cleaning adapter for cleaning units and disinfectors (see Instructions for Use – Accessories)
- After preparation in the cleaning unit and disinfector, check that the coolant channels are dry and, if necessary, dry again with compressed air. -
Can the SA-40 be used with the Piezomed Module Plus II?
Yes, but automatic instrument detection must be deactivated in the submenu. Settings such as power group, power, and coolant flow must be set by the user according to the instrument card (included with every W&H piezo instrument).
-
How long do the instruments last and when should they be replaced?
 Reprocessing Devices

-
Assistina TWIN (7)
-
Why is there no rotational lubrication option in the Assistina TWIN?
The oil is atomized in the Assistina TWIN before it is enters the instrument. This ensures full coverage of the gear parts, eliminating the need for technically complex and time-consuming rotational lubrication. However, there is no negative impact on the maintenance quality: the results of a maintenance operation correspond to those achieved with the Assistina 301 Plus.
-
How do you replace the TWIN Care Set?
The two cartridges and the filter can be changed easily without any tools. As with the Assistina 3x2/3x3, the fluid is supplied via tapping needles in the bottom of the cartridge spaces that penetrate the cartridge membrane, thereby drawing the fluid out of the cartridge. The two cartridges have different shapes to ensure that the two fluid types cannot be mixed up. In addition, it is only possible to install the HEPA filter incorrectly by using force, which is not necessary.
-
How often does the TWIN Care Set need to be replaced?
The consumption volumes for each instrument are 0.07 ml of oil and 0.07 ml of cleaning solution. This gives a maximum capacity of 2857 cycles. In reality, the value is around 2800 to 2850 cycles, as initial filling is also required and the fill quantity of the cartridges is subject to certain tolerances that are regulated by the applicable standards.
-
How does the user know when the TWIN Care Set needs to be replaced?
The intelligent process monitoring system documents the number of maintenance cycles that have been performed, thereby automatically calculating the number of instruments that can be serviced with the remaining quantity of fluid. The user receives an alert 300 cycles before the cartridge needs replacing (the oil and cleaner LEDs on the top of the unit turn yellow in colour).
-
Why does the Assistina TWIN have a HEPA filter?
During the maintenance process in the Assistina TWIN, the rotating parts are lubricated with oil and the spray channels rinsed with cleaning solution. These liquids are introduced to the handpieces using compressed air, which produces aerosols that may contain potentially contaminated body fluids (e.g. blood and saliva). In order to ensure that the apparatus poses no risk to the user, the patient or third parties, the law stipulates that aerosols must be prevented from leaking out of the apparatus. We make sure of this by using active suction and the HEPA filter. This HEPA filter must of course be changed regularly, which is why the lifespan of the filter is matched exactly to the capacity of the two cartridges. The HEPA filter therefore reaches the end of its service life once one set of cartridges has been used.
-
What instrument adaptors are available for the Assistina TWIN?
All adaptors that are suitable for the Assistina 3x2/3x3 can also be used in the Assistina TWIN. There is only one exception: the RM/ISO adaptor for the Assistina 3x2/3x3 is not compatible with the Assistina TWIN. Quick Connect adaptors ISO and RM can be used for the Assistina TWIN instead. An overview of all adaptors is available on the product website.
-
What does HEPA mean, and what is filtered out of the air?
HEPA is short for 'High Efficiency Particular Air', and the filter is classified as HEPA class E11. This means that the filter retains all particles larger than 1 µm, which includes, among other things, a wide range of bacteria and viruses, suspended particles such as dust and respirable aerosols.
-
Why is there no rotational lubrication option in the Assistina TWIN?
-
Assistina 301 plus (4)
-
How much air pressure does the Assistina 301 plus require in order to operate properly?
The pressure should be between 4 - 10 bar (58 to 145 psi).
-
Correct use of Assistina 301plus.
Please find a detailed description about first startup, regular use and maintenance in the user manual. Furthermore you can find video tutorials about Assistina 301plus.
-
How often should the filter in the supply air be changed (Assistina 301 plus)?
Annually or if the filter is full of debris (visual check - filter should be white). Please see video about changing the filter).
-
How can I check if my Assistina 301 is working correctly?
Check/replace the O-rings on the motor coupling/adapter (FAQ video Assistina O-rings). Ensure that the Start button is held depressed for at least 2 seconds when starting a programme. When the button is pressed, the green ball should be visible on the right in the functional display (cleaning solution). When the button is then released again, the green ball should be shown on the left. This procedure is also demonstrated in the FAQ video "Using Assistina". A detailed functional check can be found in the "weekly checklist" and in the "Test and functional check" section of the instructions for use.
-
How much air pressure does the Assistina 301 plus require in order to operate properly?
-
Assistina (1)
-
Correct use of Assistina 301plus.
Please find a detailed description about first startup, regular use and maintenance in the user manual. Furthermore you can find video tutorials about Assistina 301plus.
-
Correct use of Assistina 301plus.
-
Assistina ONE (8)
-
How does the user know when the ONE Care Set needs to be replaced?
The ONE Care Set must be replaced when the cartridges are empty. The levels can be checked thanks to the device's fill level indicators, located on the right and left sides.
-
What is the difference between oil nebulization and rotational lubrication?
Final result is the same, but in a shorter time. In the nebulization system, oil is nebulized in the adaptor before it is blown into the handpiece. An oil mist coats all gear parts.
-
Why there is no rotational lubrication option in the Assistina One?
The oil is atomized in the Assistina One before it enters the instrument. This ensures full coverage of the gear parts, eliminating the need for technically complex and time-consuming rotational lubrication. However, there is no negative impact on the maintenance quality.
-
How do you replace the ONE Care Set?
The two cartridges and the filter can be changed easily without any tools. The fluid is supplied via tapping needles in the bottom of the cartridge spaces that penetrate the cartridge membrane, thereby drawing the fluid out of the cartridge. The two cartridges have different shapes to ensure that the two fluid types cannot be mixed up. In addition, it is only possible to install the HEPA filter incorrectly by using force, which is not necessary.
-
What does HEPA mean, and what is filtered out of the air?
HEPA is short for 'High Efficiency Particular Air', and the filter is classified as HEPA class E11. This means that the filter retains all particles larger than 1 µm, which includes, among other things, a wide range of bacteria and viruses, suspended particles such as dust and respirable aerosols.
-
What instrument adaptors are available for the Assistina One?
All adaptors that are suitable for the Assistina 3x2/3x3 can also be used in the Assistina One. There is only one exception: the RM/ISO adaptor for the Assistina 3x2/3x3 is not compatible with the Assistina One. Quick Connect adaptors ISO and RM can be used for the Assistina One instead. An overview of all adaptors is available in the product website.
-
How often does the ONE Care Set needs to be replaced?
The consumption volumes for each instrument are 0.07 ml of oil and 0.07 ml of cleaning solution. This gives a maximum capacity of 2857 cycles. The value is around 2800 to 2850 cycles, as initial filling is also required and the fill quantity of the cartridges is subject to certain tolerances that are regulated by the applicable standards.
-
Why does the Assistina One have a HEPA filter?
During the maintenance process in the Assistina One, the rotating parts are lubricated with oil, and the spray channels rinsed with cleaning solution. These liquids are introduced to the handpieces using compressed air, which produces aerosols that may contain potentially contaminated body fluids (e.g. blood and saliva). In order to ensure that the apparatus poses no risk to the user, the patient or third parties, the legislation stipulates that aerosols must be prevented from leaking out of the apparatus. We make sure of this by using active suction and the HEPA filter. This HEPA filter must of course be changed regularly, which is why the lifespan of the filter is matched exactly to the capacity of the two cartridges. The HEPA filter therefore reaches the end of its service life once one set of cartridges has been used.
-
How does the user know when the ONE Care Set needs to be replaced?
 Cordless Devices

-
Proxeo Twist Cordless (13)
-
How long is the battery life of the Proxeo Twist Cordless?
The rechargeable battery normally lasts for around one working day (8–12 patients with a polishing duration of 4–6 minutes [actual time the foot control is ‘on’]).
-
Is it the same rechargeable battery as a smartphone and what is the rechargeable battery’s capacity in comparison to the lifespan of the medical device? With a smartphone, I have to charge more often the older it gets.
The Proxeo Twist Cordless has a Li-ion rechargeable battery (like many smartphones). That said, you can’t compare the Proxeo Twist Cordless with a smartphone in this context. Smartphones have apps and updates installed on them which require more processing capacity and are also updated in the background. This shortens the life of the smartphone’s rechargeable battery and means it needs to be recharged more often, even though it only loses a small amount of capacity.
-
Are there any recommendations for charging the Proxeo Twist Cordless’ rechargeable battery?
Yes, we recommend charging the battery from time to time (e.g. during the lunch break), in order to achieve optimal performance.
-
How long does the foot control’s rechargeable battery last?
The rechargeable battery lasts approx. two months based on average use (5 working days with 8–12 patients/day for 4–6 minutes).
-
Is it possible to thermally disinfect and sterilize the Proxeo Twist Cordless?
The Proxeo Twist Cordless can be fully disinfected by wiping down. The handpiece sleeve can be sterilized and thermally disinfected. The foot control can also be disinfected by wiping down. You will find further information on this in the Instructions for use 50928/51037/51036.
-
Which prophy angle cups can be used with the Proxeo Twist Cordless?
The Proxeo Twist prophy angle cups from W&H fit the PL-40 H, providing outstanding benefits. You can, however, use all conventional prophy angle cups with the Doriot system.
For the PL-40 HW, different contra-angle heads are available. The PL-44 can be used with Proxeo Twist disposable Angle Cups from W&H or all commercially available disposable cups with Doriot system.
With the PL-64 contra-angle head you can use all Young (screw-in connection) cups.
The PL-66 W contra-angle head can be used with the LatchShort Prophy cups/brushes from W&H. -
How can I connect the Proxeo Twist Cordless with the foot control?
You will find further information on this in the Instructions for use 50928/51037.
-
Should I always call my service department first before I send devices/instruments for repair?
If you are unsure of the cause of the problem, it is better to contact your service department first and talk to a technician. Together with the technician, malfunctions can sometimes be resolved, or it may be determined which items need to be sent for repair.
-
Can I use the W&H Proxeo Twist Prophy Angle Cups and the LatchShort Prophy Cups and Brushes more than once?
No, both are single-use only. Please dispose the Prophy Angle Cups and the LatchShort Prophy Cups and Brushes after each treatment.
-
Can my W&H handpiece or contra-angle head be processed via thermal disinfector?
Yes, providing that your W&H handpiece or contra-angle head carries the thermal disinfection symbol.
-
Can my W&H handpiece or contra-angle head be processed via sterilizer?
Yes, providing that your W&H handpiece or contra-angle head carries the relevant sterilization symbol.
-
Can I use any Prophy cup that is available on the market for the PL-66 W?
In order to benefit from the advantages of the LatchShort system and to support the longevity of the contra-angle handpiece (PL-66 W), we recommend using W&H Prophy cups.
However, it is possible for Prophy cups from standard latch systems (with a shaft of 2.35 mm) to be used. -
How can I disassemble the Young screw attachments from the PL-64 after the treatment?
For more information, please refer to Chapter 7 of the Instructions for Use 51037.
-
How long is the battery life of the Proxeo Twist Cordless?
 Straight & Contra-angle Handpieces

-
Proxeo (1)
-
Can my W&H handpiece be processed via sterilizer?
Yes, providing that your W&H handpiece carries the relevant sterilization symbol.
-
Can my W&H handpiece be processed via sterilizer?
-
Proxeo TWIST (5)
-
Can my W&H handpiece be processed via thermal disinfector and sterilizer?
Yes, providing that your W&H instrument carries the relevant thermal disinfection and sterilization symbol and the thermo disinfector should have a drying cycle.
-
Can my W&H handpiece be processed via sterilizer?
Yes, providing that your W&H handpiece carries the relevant sterilization symbol.
-
Why should I use a prophylaxis contra-angle handpiece (WP-66 W)?
Generally, prophylaxis contra-angle handpieces feature a seal on the head that prevents the ingress of saliva and paste. This extends the lifespan of the contra-angle handpiece.
The most effective removal of discolouration that at the same time protects the enamel and dentine as much as possible, depends on the polishing speed, i.e. revolutions per minute, among other things. With a speed ratio of 4:1 (four revolutions of the motor mean one revolution of the cup), the revolution speed of the Prophy cup is reduced. This means during application, there is no risk of paste splattering. -
Can I use any Prophy cup that is available on the market for the WP-66 W?
In order to benefit from the advantages of the LatchShort system and to support the longevity of the contra-angle handpiece (WP-66 W), we recommend using W&H Prophy cups. However, it is possible for Prophy cups from standard latch systems (with a shaft of 2.35 mm) to be used.
-
Should I call the service station before sending equipment for repair?
If you are not sure what the cause of the problem is, it is better to call the service station and talk to a technician. Together with the technician it can be determined what needs to be sent in and sometimes it is possible to even solve the problem right away.
-
Can my W&H handpiece be processed via thermal disinfector and sterilizer?
 Water Treatment Devices

-
Multidem (2)
-
Can the empty Multidem C27 cartridge be returned or must this be disposed of yourself (household waste)?
The products must be disposed in accordance with current local, regional and country regulations; see the disposal considerations (Section 11) contained in the Product Safety Information Sheet.
-
Which water quality should I use for my sterilizer?
The water quality for sterilizers is internationally specified by standards and directives. The reasons for this are that your sterilizer can be seriously damaged by it or the sterilization can be jeopardised. Consequently, only water with conductivity of less than 10 µS/cm in North America and 15 µS/cm for the rest of the world should be used for your W&H sterilizer. The Water treatment devices Multidem and Osmo are especially designed to prepare suitable water (see chapter “Water quality” in the Instructions for Use).
-
Can the empty Multidem C27 cartridge be returned or must this be disposed of yourself (household waste)?
-
Osmo (1)
-
Which water quality should I use for my sterilizer?
The water quality for sterilizers is internationally specified by standards and directives. The reasons for this are that your sterilizer can be seriously damaged by it or the sterilization can be jeopardised. Consequently, only water with conductivity of less than 10 µS/cm in North America and 15 µS/cm for the rest of the world should be used for your W&H sterilizer. The Water treatment devices Multidem and Osmo are especially designed to prepare suitable water (see chapter “Water quality” in the Instructions for Use).
-
Which water quality should I use for my sterilizer?
 Sterilizers

-
MS Sterilizer (2)
-
Do I need to document the results of all periodic tests?
W&H recommends recording all periodic tests, repairs, and modifications on the sterilizer in a logbook including date and signature of the person who carried out the test or other activity. Compulsorily of recording is regulated by local/national guidelines.
-
What is validation?
Validation is a testing procedure carried out by an official authority, proving the effectiveness of your sterilizer. Compulsories and frequency of validation are regulated by local/national guidelines.
-
Do I need to document the results of all periodic tests?
-
Lara (24)
-
Do I need to document the results of all periodic tests?
W&H recommends recording all periodic tests, repairs, and modifications on the sterilizer in a logbook including date and signature of the person who carried out the test or other activity. Compulsorily of recording is regulated by local/national guidelines.
-
Warning about programmed maintenance.
POSSIBLE CAUSE
The maintenance program needs to be carried out.
SOLUTION
Contact an authorised W&H service partner. -
The sterilization (PROCESS) phase of a sterilization cycle was longer than expected.
POSSIBLE CAUSE
The chamber temperature dropped below the minimum threshold and the software performed a successful recovery.
SOLUTION
Wait for cycle completion. If the problem occurs frequently, contact an authorised W&H service partner. -
The sterilizer enters into “Standby mode” immediately after being switched on.
POSSIBLE CAUSE
The unit was turned off while in standby mode.
SOLUTION
Press the standby mode button to exit. -
When starting a cycle, the chamber door locks but re-opens immediately. The “Open the door” message appears.
POSSIBLE CAUSE
Door seal not properly placed.
SOLUTION
Ensure that the door seal is correctly inserted around the whole circumference.
POSSIBLE CAUSE
Door jammed by external objects or by the load itself.
SOLUTION
Remove any objects interfering with the chamber door. Check for interference between the door and the chamber furniture and/or the load. -
No cycles are stored in the cycle history menu.
POSSIBLE CAUSE
An electronic board was replaced when serviced.
SOLUTION
The memory of the old board can not be restored. Consult the cycle history in the USB pen drive. -
Stains, spots, or colour change on instruments.
POSSIBLE CAUSE
Instruments rinsed with tap water and not dried before sterilization.
SOLUTION
Ensure that instruments are rinsed with distilled or demineralized water and completely dry before they are placed in the sterilizer.
POSSIBLE CAUSE
Use of water of poor quality or water containing chemical substances.
SOLUTION
Drain both water tanks. Use good quality water (see chapter “Water quality” in the Instructions for Use).
POSSIBLE CAUSE
Organic or chemical residues on the instruments
SOLUTION
Clean, rinse, and dry instruments before placing them in the sterilizer (see chapter “Load maintenance and preparation” in the Instructions for Use.
POSSIBLE CAUSE
Dirt in chamber, trays, tray rack.
SOLUTION
Clean the chamber and wash the chamber furniture.
POSSIBLE CAUSE
Contact between instruments of different materials.
SOLUTION
Ensure that instruments of different materials do not touch each other (aluminium, carbon or stainless steel, etc.); place them on different trays or cassettes or pouch them (see chapter “Load maintenance and preparation” in the Instructions for Use).
POSSIBLE CAUSE
Scale deposits on the chamber.
SOLUTION
Clean the chamber and use good quality water (see chapter “Water quality” in the Instructions for Use). -
At the end of the cycle, there is residual water on load.
POSSIBLE CAUSE
Sterilizer not properly levelled.
SOLUTION
Place the sterilizator on a flat, level surface.
POSSIBLE CAUSE
Overloaded chamber.
SOLUTION
Comply with the maximum load weight limits for each type of load. Always use the chamber rack for trays and cassettes.
POSSIBLE CAUSE
Chamber filter clogged.
SOLUTION
Remove and clean the chamber filters.
POSSIBLE CAUSE
Chamber filter cap mispositioned.
SOLUTION
Mount the chamber filter cap properly (see chapter “Monthly or 50-cycle maintenance - Cleaning the chamber filter” in the Instructions for Use).
POSSIBLE CAUSE
Load incorrectly placed.
SOLUTION
Follow the recommendations as listed in chapter “Load maintenance and preparation” in the Instructions for Use. -
Water is leaking at the front of the sterilizer.
POSSIBLE CAUSE
Leaks through the chamber door seal.
SOLUTION
Clean or replace the door seal. Clean the door surface facing the chamber.
POSSIBLE CAUSE
Internal leak.
SOLUTION
Contact an authorised W&H service partner. -
The sterilizer remains switched OFF.
POSSIBLE CAUSE
The main switch or network circuit breaker is OFF.
SOLUTION
Activate the main switch or network circuit breaker (ON).
POSSIBLE CAUSE
No voltage at the socket.
SOLUTION
Check the building electrical supply.
POSSIBLE CAUSE
The power cord is not connected properly.
SOLUTION
Check and connect the power cord properly. -
Should I pouch/wrap my instruments and how long can I store them after sterilization?
To ensure that your instruments are stored in a sterile state from their successful sterilization until they are used, W&H recommends wrapping them in suitable sterile barrier systems before sterilization. The recommended storage period can be found in the recommendations of the wrapping material manufacturer. For further information, please contact your dealer.
-
How do I clean the water tanks and what products should I use?
Water tank cleaning instructions are provided in the Instructions for Use, chapter “Maintenance”. In addition, a video description is available: • in the sterilizer, in the maintenance section of the menu; • in the Consumables & Accessories and Video Tutorial section of this website.
-
How do I change consumable components on my sterilizer?
Consumable replacement instructions are provided in the Instructions for Use, chapter “Maintenance”. In addition, a video description is available: • in the sterilizer, in the maintenance section of the menu; • in the Consumables & Accessories and Video Tutorial section of this website.
-
Who should I contact to validate and maintain my sterilizer?
Validation shall be carried out by an official authority. Maintenance tasks shall be carried out by a qualified and authorised technician.
-
Does my sterilizer need any periodic qualification/validation?
Validation generally comprises a range of tests defined in internationally recognised standards. These tests begin for every device with the factory tests at W&H. In addition, corresponding documentation is included with your device. Prior to commissioning the device at your premises, the technician performs further checks to ensure the device functions correctly. Then, depending on the national/regional laws and directives, the device must be subjected to a so-called renewed performance qualification at regular intervals. For further information, please contact your dealer.
-
How long should I archive the documentation of regular tests?
Keep the results according to your country/regional specific laws and guidelines. Those records can be of assistance in case of service as well.
-
The cycle report printer does not work.
POSSIBLE CAUSE
Printer not properly connected or not powered.
SOLUTION
Check the data and power connection to the printer. -
What is validation?
Validation is a testing procedure carried out by an official authority, proving the effectiveness of your sterilizer. Compulsories and frequency of validation are regulated by local/national guidelines.
-
Warning about consumable replacement.
POSSIBLE CAUSE
A consumable needs to be replaced.
SOLUTION
Order the requested consumable (door seal and HEPA/bacteriological filter) and replace it. See the chapter “Maintenance” in the Instructions for Use. -
The sterilizer is connected to an automated water supply system, there is no clean water in the tank and the automatic water filling does not fill the water.
POSSIBLE CAUSE
Water filling system not connected.
SOLUTION
Connect the water filling system to the sterilizer. (see Instructions for Use).
POSSIBLE CAUSE
When the water filling system attempted to fill the tank, water was temporarily unavailable.
SOLUTION
Since the water tank filling is attempted only once in-between cycle execution, this event inhibits water feeding. Switch the sterilizer OFF and then ON again.
Check the external water supply system.
Check for water leaks from the sterilizer.
POSSIBLE CAUSE
Faulty MIN water level sensor in the clean water tank.
SOLUTION
Contact an authorised W&H service partner. -
Do I need to carry out periodic testing on my W&H sterilizer?
All W&H sterilizers feature test cycles (B&D/Helix test, Vacuum test). Compulsory and frequency of testing are regulated by local/national guidelines.
-
What is the maximum noise level of the Lara, Lara XL and Lexa Plus sterilizer?
The max. noise level of Lara is 66.9 dB. The max. noise level of Lara XL/Lexa Plus is 70 dB.
-
Warning about saving to the USB (HTML and SCL files)
POSSIBLE CAUSE
The USB drive is disconnected or full.
SOLUTION
Check presence and condition of the USB drive. If the problem persists, contact an authorised W&H service partner. -
Which water quality should I use for my sterilizer?
The water quality for sterilizers is internationally specified by standards and directives. The reasons for this are that your sterilizer can be seriously damaged by it or the sterilization can be jeopardised. Consequently, only water with conductivity of less than 10 µS/cm in North America and 15 µS/cm for the rest of the world should be used for your W&H sterilizer. The Water treatment devices Multidem and Osmo are especially designed to prepare suitable water (see chapter “Water quality” in the Instructions for Use).
-
Do I need to document the results of all periodic tests?
-
Lisa Mini (12)
-
Do I need to document the results of all periodic tests?
W&H recommends recording all periodic tests, repairs, and modifications on the sterilizer in a logbook including date and signature of the person who carried out the test or other activity. Compulsorily of recording is regulated by local/national guidelines.
-
Should I pouch/wrap my instruments and how long can I store them after sterilization?
To ensure that your instruments are stored in a sterile state from their successful sterilization until they are used, W&H recommends wrapping them in suitable sterile barrier systems before sterilization. The recommended storage period can be found in the recommendations of the wrapping material manufacturer. For further information, please contact your dealer.
-
Who should I contact to validate and maintain my sterilizer?
Validation shall be carried out by an official authority. Maintenance tasks shall be carried out by a qualified and authorised technician.
-
Does my sterilizer need any periodic qualification/validation?
Validation generally comprises a range of tests defined in internationally recognised standards. These tests begin for every device with the factory tests at W&H. In addition, corresponding documentation is included with your device. Prior to commissioning the device at your premises, the technician performs further checks to ensure the device functions correctly. Then, depending on the national/regional laws and directives, the device must be subjected to a so-called renewed performance qualification at regular intervals. For further information, please contact your dealer.
-
How long should I archive the documentation of regular tests?
Keep the results according to your country/regional specific laws and guidelines. Those records can be of assistance in case of service as well.
-
What is validation?
Validation is a testing procedure carried out by an official authority, proving the effectiveness of your sterilizer. Compulsories and frequency of validation are regulated by local/national guidelines.
-
Do I need to carry out periodic testing on my W&H sterilizer?
All W&H sterilizers feature test cycles (B&D/Helix test, Vacuum test). Compulsory and frequency of testing are regulated by local/national guidelines.
-
How do I change consumable components on my sterilizer?
Consumable replacement instructions are provided in the Instructions for Use, chapter “Maintenance”. In addition, a video description is available: • in the sterilizer, in the maintenance section of the menu.
-
What is the maximum noise level of the Lisa Mini sterilizer?
The max. noise level of Lisa Mini is 64 dB.
-
Is Lisa Mini requiring compressed air connection?
Lisa Mini requires compressed air connection to perform sterilization cycle. The compressed air specifications are available in the Instruction for Use, chapter “Technical data”.
-
How do I clean the water tank and what products should I use?
Water tank cleaning instructions are provided in the Instructions for Use, chapter “Maintenance”. In addition, a video description is available: • in the sterilizer, in the maintenance section of the menu.
-
Which water quality should I use for my sterilizer?
The water quality for sterilizers is internationally specified by standards and directives. The reasons for this are that your sterilizer can be seriously damaged by it or the sterilization can be jeopardised. Consequently, only water with conductivity of less than 10 µS/cm in North America and 15 µS/cm for the rest of the world should be used for your W&H sterilizer. The Water treatment devices Multidem and Osmo are especially designed to prepare suitable water (see chapter “Water quality” in the Instructions for Use).
-
Do I need to document the results of all periodic tests?
-
Lina (24)
-
Which is the maximum noise level of Lina?
The max. noise level of Lina is 65.5 dB.
-
Do I need to document the results of all periodic tests?
W&H recommends recording all periodic tests, repairs, and modifications on the sterilizer in a logbook including date and signature of the person who carried out the test or other activity. Compulsorily of recording is regulated by local/national guidelines.
-
Warning about programmed maintenance.
POSSIBLE CAUSE
The maintenance program needs to be carried out.
SOLUTION
Contact an authorised W&H service partner. -
The sterilization (PROCESS) phase of a sterilization cycle was longer than expected.
POSSIBLE CAUSE
The chamber temperature dropped below the minimum threshold and the software performed a successful recovery.
SOLUTION
Wait for cycle completion. If the problem occurs frequently, contact an authorised W&H service partner. -
The sterilizer enters into “Standby mode” immediately after being switched on.
POSSIBLE CAUSE
The unit was turned off while in standby mode.
SOLUTION
Press the standby mode button to exit. -
When starting a cycle, the chamber door locks but re-opens immediately. The “Open the door” message appears.
POSSIBLE CAUSE
Door seal not properly placed.
SOLUTION
Ensure that the door seal is correctly inserted around the whole circumference.
POSSIBLE CAUSE
Door jammed by external objects or by the load itself.
SOLUTION
Remove any objects interfering with the chamber door. Check for interference between the door and the chamber furniture and/or the load. -
No cycles are stored in the cycle history menu.
POSSIBLE CAUSE
An electronic board was replaced when serviced.
SOLUTION
The memory of the old board can not be restored. Consult the cycle history in the USB pen drive. -
Stains, spots, or colour change on instruments.
POSSIBLE CAUSE
Instruments rinsed with tap water and not dried before sterilization.
SOLUTION
Ensure that instruments are rinsed with distilled or demineralized water and completely dry before they are placed in the sterilizer.
POSSIBLE CAUSE
Use of water of poor quality or water containing chemical substances.
SOLUTION
Drain both water tanks. Use good quality water (see chapter “Water quality” in the Instructions for Use).
POSSIBLE CAUSE
Organic or chemical residues on the instruments
SOLUTION
Clean, rinse, and dry instruments before placing them in the sterilizer (see chapter “Load maintenance and preparation” in the Instructions for Use.
POSSIBLE CAUSE
Dirt in chamber, trays, tray rack.
SOLUTION
Clean the chamber and wash the chamber furniture.
POSSIBLE CAUSE
Contact between instruments of different materials.
SOLUTION
Ensure that instruments of different materials do not touch each other (aluminium, carbon or stainless steel, etc.); place them on different trays or cassettes or pouch them (see chapter “Load maintenance and preparation” in the Instructions for Use).
POSSIBLE CAUSE
Scale deposits on the chamber.
SOLUTION
Clean the chamber and use good quality water (see chapter “Water quality” in the Instructions for Use). -
At the end of the cycle, there is residual water on load.
POSSIBLE CAUSE
Sterilizer not properly levelled.
SOLUTION
Place the sterilizator on a flat, level surface.
POSSIBLE CAUSE
Overloaded chamber.
SOLUTION
Comply with the maximum load weight limits for each type of load. Always use the chamber rack for trays and cassettes.
POSSIBLE CAUSE
Chamber filter clogged.
SOLUTION
Remove and clean the chamber filters.
POSSIBLE CAUSE
Chamber filter cap mispositioned.
SOLUTION
Mount the chamber filter cap properly (see chapter “Monthly or 50-cycle maintenance - Cleaning the chamber filter” in the Instructions for Use).
POSSIBLE CAUSE
Load incorrectly placed.
SOLUTION
Follow the recommendations as listed in chapter “Load maintenance and preparation” in the Instructions for Use. -
Water is leaking at the front of the sterilizer.
POSSIBLE CAUSE
Leaks through the chamber door seal.
SOLUTION
Clean or replace the door seal. Clean the door surface facing the chamber.
POSSIBLE CAUSE
Internal leak.
SOLUTION
Contact an authorised W&H service partner. -
The sterilizer remains switched OFF.
POSSIBLE CAUSE
The main switch or network circuit breaker is OFF.
SOLUTION
Activate the main switch or network circuit breaker (ON).
POSSIBLE CAUSE
No voltage at the socket.
SOLUTION
Check the building electrical supply.
POSSIBLE CAUSE
The power cord is not connected properly.
SOLUTION
Check and connect the power cord properly. -
Should I pouch/wrap my instruments and how long can I store them after sterilization?
To ensure that your instruments are stored in a sterile state from their successful sterilization until they are used, W&H recommends wrapping them in suitable sterile barrier systems before sterilization. The recommended storage period can be found in the recommendations of the wrapping material manufacturer. For further information, please contact your dealer.
-
How do I clean the water tanks and what products should I use?
Water tank cleaning instructions are provided in the Instructions for Use, chapter “Maintenance”. In addition, a video description is available: • in the sterilizer, in the maintenance section of the menu; • in the Consumables & Accessories and Video Tutorial section of this website.
-
How do I change consumable components on my sterilizer?
Consumable replacement instructions are provided in the Instructions for Use, chapter “Maintenance”. In addition, a video description is available: • in the sterilizer, in the maintenance section of the menu; • in the Consumables & Accessories and Video Tutorial section of this website.
-
Who should I contact to validate and maintain my sterilizer?
Validation shall be carried out by an official authority. Maintenance tasks shall be carried out by a qualified and authorised technician.
-
Does my sterilizer need any periodic qualification/validation?
Validation generally comprises a range of tests defined in internationally recognised standards. These tests begin for every device with the factory tests at W&H. In addition, corresponding documentation is included with your device. Prior to commissioning the device at your premises, the technician performs further checks to ensure the device functions correctly. Then, depending on the national/regional laws and directives, the device must be subjected to a so-called renewed performance qualification at regular intervals. For further information, please contact your dealer.
-
How long should I archive the documentation of regular tests?
Keep the results according to your country/regional specific laws and guidelines. Those records can be of assistance in case of service as well.
-
The cycle report printer does not work.
POSSIBLE CAUSE
Printer not properly connected or not powered.
SOLUTION
Check the data and power connection to the printer. -
What is validation?
Validation is a testing procedure carried out by an official authority, proving the effectiveness of your sterilizer. Compulsories and frequency of validation are regulated by local/national guidelines.
-
Warning about consumable replacement.
POSSIBLE CAUSE
A consumable needs to be replaced.
SOLUTION
Order the requested consumable (door seal and HEPA/bacteriological filter) and replace it. See the chapter “Maintenance” in the Instructions for Use. -
The sterilizer is connected to an automated water supply system, there is no clean water in the tank and the automatic water filling does not fill the water.
POSSIBLE CAUSE
Water filling system not connected.
SOLUTION
Connect the water filling system to the sterilizer. (see Instructions for Use).
POSSIBLE CAUSE
When the water filling system attempted to fill the tank, water was temporarily unavailable.
SOLUTION
Since the water tank filling is attempted only once in-between cycle execution, this event inhibits water feeding. Switch the sterilizer OFF and then ON again.
Check the external water supply system.
Check for water leaks from the sterilizer.
POSSIBLE CAUSE
Faulty MIN water level sensor in the clean water tank.
SOLUTION
Contact an authorised W&H service partner. -
Do I need to carry out periodic testing on my W&H sterilizer?
All W&H sterilizers feature test cycles (B&D/Helix test, Vacuum test). Compulsory and frequency of testing are regulated by local/national guidelines.
-
Warning about saving to the USB (HTML and SCL files)
POSSIBLE CAUSE
The USB drive is disconnected or full.
SOLUTION
Check presence and condition of the USB drive. If the problem persists, contact an authorised W&H service partner. -
Which water quality should I use for my sterilizer?
The water quality for sterilizers is internationally specified by standards and directives. The reasons for this are that your sterilizer can be seriously damaged by it or the sterilization can be jeopardised. Consequently, only water with conductivity of less than 10 µS/cm in North America and 15 µS/cm for the rest of the world should be used for your W&H sterilizer. The Water treatment devices Multidem and Osmo are especially designed to prepare suitable water (see chapter “Water quality” in the Instructions for Use).
-
Which is the maximum noise level of Lina?
-
Lara XXL (25)
-
Do I need to document the results of all periodic tests?
W&H recommends recording all periodic tests, repairs, and modifications on the sterilizer in a logbook including date and signature of the person who carried out the test or other activity. Compulsorily of recording is regulated by local/national guidelines.
-
Warning about programmed maintenance.
POSSIBLE CAUSE
The maintenance program needs to be carried out.
SOLUTION
Contact an authorised W&H service partner. -
The sterilization (PROCESS) phase of a sterilization cycle was longer than expected.
POSSIBLE CAUSE
The chamber temperature dropped below the minimum threshold and the software performed a successful recovery.
SOLUTION
Wait for cycle completion. If the problem occurs frequently, contact an authorised W&H service partner. -
The sterilizer enters into “Standby mode” immediately after being switched on.
POSSIBLE CAUSE
The unit was turned off while in standby mode.
SOLUTION
Press the standby mode button to exit. -
When starting a cycle, the chamber door locks but re-opens immediately. The “Open the door” message appears.
POSSIBLE CAUSE
Door seal not properly placed.
SOLUTION
Ensure that the door seal is correctly inserted around the whole circumference.
POSSIBLE CAUSE
Door jammed by external objects or by the load itself.
SOLUTION
Remove any objects interfering with the chamber door. Check for interference between the door and the chamber furniture and/or the load. -
No cycles are stored in the cycle history menu.
POSSIBLE CAUSE
An electronic board was replaced when serviced.
SOLUTION
The memory of the old board can not be restored. Consult the cycle history in the USB pen drive. -
Stains, spots, or colour change on instruments.
POSSIBLE CAUSE
Instruments rinsed with tap water and not dried before sterilization.
SOLUTION
Ensure that instruments are rinsed with distilled or demineralized water and completely dry before they are placed in the sterilizer.
POSSIBLE CAUSE
Use of water of poor quality or water containing chemical substances.
SOLUTION
Drain both water tanks. Use good quality water (see chapter “Water quality” in the Instructions for Use).
POSSIBLE CAUSE
Organic or chemical residues on the instruments
SOLUTION
Clean, rinse, and dry instruments before placing them in the sterilizer (see chapter “Load maintenance and preparation” in the Instructions for Use.
POSSIBLE CAUSE
Dirt in chamber, trays, tray rack.
SOLUTION
Clean the chamber and wash the chamber furniture.
POSSIBLE CAUSE
Contact between instruments of different materials.
SOLUTION
Ensure that instruments of different materials do not touch each other (aluminium, carbon or stainless steel, etc.); place them on different trays or cassettes or pouch them (see chapter “Load maintenance and preparation” in the Instructions for Use).
POSSIBLE CAUSE
Scale deposits on the chamber.
SOLUTION
Clean the chamber and use good quality water (see chapter “Water quality” in the Instructions for Use). -
At the end of the cycle, there is residual water on load.
POSSIBLE CAUSE
Sterilizer not properly levelled.
SOLUTION
Place the sterilizator on a flat, level surface.
POSSIBLE CAUSE
Overloaded chamber.
SOLUTION
Comply with the maximum load weight limits for each type of load. Always use the chamber rack for trays and cassettes.
POSSIBLE CAUSE
Chamber filter clogged.
SOLUTION
Remove and clean the chamber filters.
POSSIBLE CAUSE
Chamber filter cap mispositioned.
SOLUTION
Mount the chamber filter cap properly (see chapter “Monthly or 50-cycle maintenance - Cleaning the chamber filter” in the Instructions for Use).
POSSIBLE CAUSE
Load incorrectly placed.
SOLUTION
Follow the recommendations as listed in chapter “Load maintenance and preparation” in the Instructions for Use. -
Water is leaking at the front of the sterilizer.
POSSIBLE CAUSE
Leaks through the chamber door seal.
SOLUTION
Clean or replace the door seal. Clean the door surface facing the chamber.
POSSIBLE CAUSE
Internal leak.
SOLUTION
Contact an authorised W&H service partner. -
The sterilizer remains switched OFF.
POSSIBLE CAUSE
The main switch or network circuit breaker is OFF.
SOLUTION
Activate the main switch or network circuit breaker (ON).
POSSIBLE CAUSE
No voltage at the socket.
SOLUTION
Check the building electrical supply.
POSSIBLE CAUSE
The power cord is not connected properly.
SOLUTION
Check and connect the power cord properly. -
Should I pouch/wrap my instruments and how long can I store them after sterilization?
To ensure that your instruments are stored in a sterile state from their successful sterilization until they are used, W&H recommends wrapping them in suitable sterile barrier systems before sterilization. The recommended storage period can be found in the recommendations of the wrapping material manufacturer. For further information, please contact your dealer.
-
How do I clean the water tanks and what products should I use?
Water tank cleaning instructions are provided in the Instructions for Use, chapter “Maintenance”. In addition, a video description is available: • in the sterilizer, in the maintenance section of the menu; • in the Consumables & Accessories and Video Tutorial section of this website.
-
Who should I contact to validate and maintain my sterilizer?
Validation shall be carried out by an official authority. Maintenance tasks shall be carried out by a qualified and authorised technician.
-
Does my sterilizer need any periodic qualification/validation?
Validation generally comprises a range of tests defined in internationally recognised standards. These tests begin for every device with the factory tests at W&H. In addition, corresponding documentation is included with your device. Prior to commissioning the device at your premises, the technician performs further checks to ensure the device functions correctly. Then, depending on the national/regional laws and directives, the device must be subjected to a so-called renewed performance qualification at regular intervals. For further information, please contact your dealer.
-
How long should I archive the documentation of regular tests?
Keep the results according to your country/regional specific laws and guidelines. Those records can be of assistance in case of service as well.
-
The cycle report printer does not work.
POSSIBLE CAUSE
Printer not properly connected or not powered.
SOLUTION
Check the data and power connection to the printer. -
What is validation?
Validation is a testing procedure carried out by an official authority, proving the effectiveness of your sterilizer. Compulsories and frequency of validation are regulated by local/national guidelines.
-
Warning about consumable replacement.
POSSIBLE CAUSE
A consumable needs to be replaced.
SOLUTION
Order the requested consumable (door seal and HEPA/bacteriological filter) and replace it. See the chapter “Maintenance” in the Instructions for Use. -
The sterilizer is connected to an automated water supply system, there is no clean water in the tank and the automatic water filling does not fill the water.
POSSIBLE CAUSE
Water filling system not connected.
SOLUTION
Connect the water filling system to the sterilizer. (see Instructions for Use).
POSSIBLE CAUSE
When the water filling system attempted to fill the tank, water was temporarily unavailable.
SOLUTION
Since the water tank filling is attempted only once in-between cycle execution, this event inhibits water feeding. Switch the sterilizer OFF and then ON again.
Check the external water supply system.
Check for water leaks from the sterilizer.
POSSIBLE CAUSE
Faulty MIN water level sensor in the clean water tank.
SOLUTION
Contact an authorised W&H service partner. -
Do I need to carry out periodic testing on my W&H sterilizer?
All W&H sterilizers feature test cycles (B&D/Helix test, Vacuum test). Compulsory and frequency of testing are regulated by local/national guidelines.
-
Warning about saving to the USB (HTML and SCL files)
POSSIBLE CAUSE
The USB drive is disconnected or full.
SOLUTION
Check presence and condition of the USB drive. If the problem persists, contact an authorised W&H service partner. -
Which water quality should I use for my sterilizer?
The water quality for sterilizers is internationally specified by standards and directives. The reasons for this are that your sterilizer can be seriously damaged by it or the sterilization can be jeopardised. Consequently, only water with conductivity of less than 10 µS/cm in North America and 15 µS/cm for the rest of the world should be used for your W&H sterilizer. The Water treatment devices Multidem and Osmo are especially designed to prepare suitable water (see chapter “Water quality” in the Instructions for Use).
-
What is the maximum noise level of the Lara XXL sterilizer?
The max. noise level of Lara XXL is 70 dB.
-
At the end of the cycle, there is residual water on load.
POSSIBLE CAUSE Sterilizer not properly levelled. SOLUTION Place the sterilizer on a flat, levelled surface. POSSIBLE CAUSE Overloaded chamber. SOLUTION Comply with the maximum load weight limits for each type of load. Always use the chamber rack for trays and cassettes. POSSIBLE CAUSE Chamber filters clogged. SOLUTION Remove and clean the chamber filters. POSSIBLE CAUSE Load incorrectly placed. SOLUTION Follow the recommendations as listed in chapter “Load maintenance and preparation” in the Instructions for Use.
-
How do I change consumable components on my sterilizer?
Consumable replacement instructions are provided in the Instructions for Use, chapter “Maintenance”. In addition, a video description is available: • in the sterilizer, in the maintenance section of the menu; • in the Consumables & Accessories and Video Tutorial section of this website.
-
Do I need to document the results of all periodic tests?
-
Lexa (23)
-
What is the maximum noise level of the Lexa sterilizer?
The max. noise level of Lexa is 65 dB.
-
Which water quality should I use for my sterilizer?
The water quality for sterilizers is internationally specified by standards and directives. The reasons for this are that your sterilizer can be seriously damaged by it or the sterilization can be jeopardized. Consequently, only water with conductivity of less than 10 µS/cm should be used for your W&H sterilizer. The Multidem system is especially suited to preparing suitable water (see chapter “Water quality” in the Instructions for Use).
-
Do I need to document the results of all periodic tests?
W&H recommends recording all periodic tests, repairs, and modifications on the sterilizer in a logbook including date and signature of the person who carried out the test or other activity. Compulsorily of recording is regulated by local/national guidelines.
-
The sterilization (PROCESS) phase of a sterilization cycle was longer than expected.
POSSIBLE CAUSE
The chamber temperature dropped below the minimum threshold and the software performed a successful recovery.
SOLUTION
Wait for cycle completion. If the problem occurs frequently, contact an authorised W&H service partner. -
The sterilizer enters into “Standby mode” immediately after being switched on.
POSSIBLE CAUSE
The unit was turned off while in standby mode.
SOLUTION
Press the standby mode button to exit. -
When starting a cycle, the chamber door locks but re-opens immediately. The “Open the door” message appears.
POSSIBLE CAUSE
Door seal not properly placed.
SOLUTION
Ensure that the door seal is correctly inserted around the whole circumference.
POSSIBLE CAUSE
Door jammed by external objects or by the load itself.
SOLUTION
Remove any objects interfering with the chamber door. Check for interference between the door and the chamber furniture and/or the load. -
No cycles are stored in the cycle history menu.
POSSIBLE CAUSE
An electronic board was replaced when serviced.
SOLUTION
The memory of the old board can not be restored. Consult the cycle history in the USB pen drive. -
Stains, spots, or colour change on instruments.
POSSIBLE CAUSE
Instruments rinsed with tap water and not dried before sterilization.
SOLUTION
Ensure that instruments are rinsed with distilled or demineralized water and completely dry before they are placed in the sterilizer.
POSSIBLE CAUSE
Use of water of poor quality or water containing chemical substances.
SOLUTION
Drain both water tanks. Use good quality water (see chapter “Water quality” in the Instructions for Use).
POSSIBLE CAUSE
Organic or chemical residues on the instruments
SOLUTION
Clean, rinse, and dry instruments before placing them in the sterilizer (see chapter “Load maintenance and preparation” in the Instructions for Use.
POSSIBLE CAUSE
Dirt in chamber, trays, tray rack.
SOLUTION
Clean the chamber and wash the chamber furniture.
POSSIBLE CAUSE
Contact between instruments of different materials.
SOLUTION
Ensure that instruments of different materials do not touch each other (aluminium, carbon or stainless steel, etc.); place them on different trays or cassettes or pouch them (see chapter “Load maintenance and preparation” in the Instructions for Use).
POSSIBLE CAUSE
Scale deposits on the chamber.
SOLUTION
Clean the chamber and use good quality water (see chapter “Water quality” in the Instructions for Use). -
At the end of the cycle, there is residual water on load.
POSSIBLE CAUSE
Sterilizer not properly levelled.
SOLUTION
Place the sterilizator on a flat, level surface.
POSSIBLE CAUSE
Overloaded chamber.
SOLUTION
Comply with the maximum load weight limits for each type of load. Always use the chamber rack for trays and cassettes.
POSSIBLE CAUSE
Chamber filter clogged.
SOLUTION
Remove and clean the chamber filters.
POSSIBLE CAUSE
Chamber filter cap mispositioned.
SOLUTION
Mount the chamber filter cap properly (see chapter “Monthly or 50-cycle maintenance - Cleaning the chamber filter” in the Instructions for Use).
POSSIBLE CAUSE
Load incorrectly placed.
SOLUTION
Follow the recommendations as listed in chapter “Load maintenance and preparation” in the Instructions for Use. -
Water is leaking at the front of the sterilizer.
POSSIBLE CAUSE
Leaks through the chamber door seal.
SOLUTION
Clean or replace the door seal. Clean the door surface facing the chamber.
POSSIBLE CAUSE
Internal leak.
SOLUTION
Contact an authorised W&H service partner. -
The sterilizer remains switched OFF.
POSSIBLE CAUSE
The main switch or network circuit breaker is OFF.
SOLUTION
Activate the main switch or network circuit breaker (ON).
POSSIBLE CAUSE
No voltage at the socket.
SOLUTION
Check the building electrical supply.
POSSIBLE CAUSE
The power cord is not connected properly.
SOLUTION
Check and connect the power cord properly. -
Should I pouch/wrap my instruments and how long can I store them after sterilization?
To ensure that your instruments are stored in a sterile state from their successful sterilization until they are used, W&H recommends wrapping them in suitable sterile barrier systems before sterilization. The recommended storage period can be found in the recommendations of the wrapping material manufacturer. For further information, please contact your dealer.
-
How do I clean the water tanks and what products should I use?
Water tank cleaning instructions are provided in the Instructions for Use, chapter “Maintenance”. In addition, a video description is available: • in the sterilizer, in the maintenance section of the menu; • in the Consumables & Accessories and Video Tutorial section of this website.
-
How do I change consumable components on my sterilizer?
Consumable replacement instructions are provided in the Instructions for Use, chapter “Maintenance”. In addition, a video description is available: • in the sterilizer, in the maintenance section of the menu; • in the Consumables & Accessories and Video Tutorial section of this website.
-
Who should I contact to validate and maintain my sterilizer?
Validation shall be carried out by an official authority. Maintenance tasks shall be carried out by a qualified and authorised technician.
-
Does my sterilizer need any periodic qualification/validation?
Validation generally comprises a range of tests defined in internationally recognised standards. These tests begin for every device with the factory tests at W&H. In addition, corresponding documentation is included with your device. Prior to commissioning the device at your premises, the technician performs further checks to ensure the device functions correctly. Then, depending on the national/regional laws and directives, the device must be subjected to a so-called renewed performance qualification at regular intervals. For further information, please contact your dealer.
-
How long should I archive the documentation of regular tests?
Keep the results according to your country/regional specific laws and guidelines. Those records can be of assistance in case of service as well.
-
The cycle report printer does not work.
POSSIBLE CAUSE
Printer not properly connected or not powered.
SOLUTION
Check the data and power connection to the printer. -
What is validation?
Validation is a testing procedure carried out by an official authority, proving the effectiveness of your sterilizer. Compulsories and frequency of validation are regulated by local/national guidelines.
-
Warning about consumable replacement.
POSSIBLE CAUSE
A consumable needs to be replaced.
SOLUTION
Order the requested consumable (door seal and HEPA/bacteriological filter) and replace it. See the chapter “Maintenance” in the Instructions for Use. -
The sterilizer is connected to an automated water supply system, there is no clean water in the tank and the automatic water filling does not fill the water.
POSSIBLE CAUSE
Water filling system not connected.
SOLUTION
Connect the water filling system to the sterilizer. (see Instructions for Use).
POSSIBLE CAUSE
When the water filling system attempted to fill the tank, water was temporarily unavailable.
SOLUTION
Since the water tank filling is attempted only once in-between cycle execution, this event inhibits water feeding. Switch the sterilizer OFF and then ON again.
Check the external water supply system.
Check for water leaks from the sterilizer.
POSSIBLE CAUSE
Faulty MIN water level sensor in the clean water tank.
SOLUTION
Contact an authorised W&H service partner. -
Do I need to carry out periodic testing on my W&H sterilizer?
All W&H sterilizers feature test cycles (B&D/Helix test, Vacuum test). Compulsory and frequency of testing are regulated by local/national guidelines.
-
Warning about saving to the USB (HTML and SCL files)
POSSIBLE CAUSE
The USB drive is disconnected or full.
SOLUTION
Check presence and condition of the USB drive. If the problem persists, contact an authorised W&H service partner.
-
What is the maximum noise level of the Lexa sterilizer?
-
Lyla (24)
-
Which is the maximum noise level of Lyla?
The max. noise level of Lyla is 65.5 dB.
-
Do I need to document the results of all periodic tests?
W&H recommends recording all periodic tests, repairs, and modifications on the sterilizer in a logbook including date and signature of the person who carried out the test or other activity. Compulsorily of recording is regulated by local/national guidelines.
-
Warning about programmed maintenance.
POSSIBLE CAUSE
The maintenance program needs to be carried out.
SOLUTION
Contact an authorised W&H service partner. -
The sterilization (PROCESS) phase of a sterilization cycle was longer than expected.
POSSIBLE CAUSE
The chamber temperature dropped below the minimum threshold and the software performed a successful recovery.
SOLUTION
Wait for cycle completion. If the problem occurs frequently, contact an authorised W&H service partner. -
The sterilizer enters into “Standby mode” immediately after being switched on.
POSSIBLE CAUSE
The unit was turned off while in standby mode.
SOLUTION
Press the standby mode button to exit. -
When starting a cycle, the chamber door locks but re-opens immediately. The “Open the door” message appears.
POSSIBLE CAUSE
Door seal not properly placed.
SOLUTION
Ensure that the door seal is correctly inserted around the whole circumference.
POSSIBLE CAUSE
Door jammed by external objects or by the load itself.
SOLUTION
Remove any objects interfering with the chamber door. Check for interference between the door and the chamber furniture and/or the load. -
No cycles are stored in the cycle history menu.
POSSIBLE CAUSE
An electronic board was replaced when serviced.
SOLUTION
The memory of the old board can not be restored. Consult the cycle history in the USB pen drive. -
Stains, spots, or colour change on instruments.
POSSIBLE CAUSE
Instruments rinsed with tap water and not dried before sterilization.
SOLUTION
Ensure that instruments are rinsed with distilled or demineralized water and completely dry before they are placed in the sterilizer.
POSSIBLE CAUSE
Use of water of poor quality or water containing chemical substances.
SOLUTION
Drain both water tanks. Use good quality water (see chapter “Water quality” in the Instructions for Use).
POSSIBLE CAUSE
Organic or chemical residues on the instruments
SOLUTION
Clean, rinse, and dry instruments before placing them in the sterilizer (see chapter “Load maintenance and preparation” in the Instructions for Use.
POSSIBLE CAUSE
Dirt in chamber, trays, tray rack.
SOLUTION
Clean the chamber and wash the chamber furniture.
POSSIBLE CAUSE
Contact between instruments of different materials.
SOLUTION
Ensure that instruments of different materials do not touch each other (aluminium, carbon or stainless steel, etc.); place them on different trays or cassettes or pouch them (see chapter “Load maintenance and preparation” in the Instructions for Use).
POSSIBLE CAUSE
Scale deposits on the chamber.
SOLUTION
Clean the chamber and use good quality water (see chapter “Water quality” in the Instructions for Use). -
At the end of the cycle, there is residual water on load.
POSSIBLE CAUSE
Sterilizer not properly levelled.
SOLUTION
Place the sterilizator on a flat, level surface.
POSSIBLE CAUSE
Overloaded chamber.
SOLUTION
Comply with the maximum load weight limits for each type of load. Always use the chamber rack for trays and cassettes.
POSSIBLE CAUSE
Chamber filter clogged.
SOLUTION
Remove and clean the chamber filters.
POSSIBLE CAUSE
Chamber filter cap mispositioned.
SOLUTION
Mount the chamber filter cap properly (see chapter “Monthly or 50-cycle maintenance - Cleaning the chamber filter” in the Instructions for Use).
POSSIBLE CAUSE
Load incorrectly placed.
SOLUTION
Follow the recommendations as listed in chapter “Load maintenance and preparation” in the Instructions for Use. -
Water is leaking at the front of the sterilizer.
POSSIBLE CAUSE
Leaks through the chamber door seal.
SOLUTION
Clean or replace the door seal. Clean the door surface facing the chamber.
POSSIBLE CAUSE
Internal leak.
SOLUTION
Contact an authorised W&H service partner. -
The sterilizer remains switched OFF.
POSSIBLE CAUSE
The main switch or network circuit breaker is OFF.
SOLUTION
Activate the main switch or network circuit breaker (ON).
POSSIBLE CAUSE
No voltage at the socket.
SOLUTION
Check the building electrical supply.
POSSIBLE CAUSE
The power cord is not connected properly.
SOLUTION
Check and connect the power cord properly. -
Should I pouch/wrap my instruments and how long can I store them after sterilization?
To ensure that your instruments are stored in a sterile state from their successful sterilization until they are used, W&H recommends wrapping them in suitable sterile barrier systems before sterilization. The recommended storage period can be found in the recommendations of the wrapping material manufacturer. For further information, please contact your dealer.
-
How do I clean the water tanks and what products should I use?
Water tank cleaning instructions are provided in the Instructions for Use, chapter “Maintenance”. In addition, a video description is available: • in the sterilizer, in the maintenance section of the menu; • in the Consumables & Accessories and Video Tutorial section of this website.
-
How do I change consumable components on my sterilizer?
Consumable replacement instructions are provided in the Instructions for Use, chapter “Maintenance”. In addition, a video description is available: • in the sterilizer, in the maintenance section of the menu; • in the Consumables & Accessories and Video Tutorial section of this website.
-
Who should I contact to validate and maintain my sterilizer?
Validation shall be carried out by an official authority. Maintenance tasks shall be carried out by a qualified and authorised technician.
-
Does my sterilizer need any periodic qualification/validation?
Validation generally comprises a range of tests defined in internationally recognised standards. These tests begin for every device with the factory tests at W&H. In addition, corresponding documentation is included with your device. Prior to commissioning the device at your premises, the technician performs further checks to ensure the device functions correctly. Then, depending on the national/regional laws and directives, the device must be subjected to a so-called renewed performance qualification at regular intervals. For further information, please contact your dealer.
-
How long should I archive the documentation of regular tests?
Keep the results according to your country/regional specific laws and guidelines. Those records can be of assistance in case of service as well.
-
The cycle report printer does not work.
POSSIBLE CAUSE
Printer not properly connected or not powered.
SOLUTION
Check the data and power connection to the printer. -
What is validation?
Validation is a testing procedure carried out by an official authority, proving the effectiveness of your sterilizer. Compulsories and frequency of validation are regulated by local/national guidelines.
-
Warning about consumable replacement.
POSSIBLE CAUSE
A consumable needs to be replaced.
SOLUTION
Order the requested consumable (door seal and HEPA/bacteriological filter) and replace it. See the chapter “Maintenance” in the Instructions for Use. -
The sterilizer is connected to an automated water supply system, there is no clean water in the tank and the automatic water filling does not fill the water.
POSSIBLE CAUSE
Water filling system not connected.
SOLUTION
Connect the water filling system to the sterilizer. (see Instructions for Use).
POSSIBLE CAUSE
When the water filling system attempted to fill the tank, water was temporarily unavailable.
SOLUTION
Since the water tank filling is attempted only once in-between cycle execution, this event inhibits water feeding. Switch the sterilizer OFF and then ON again.
Check the external water supply system.
Check for water leaks from the sterilizer.
POSSIBLE CAUSE
Faulty MIN water level sensor in the clean water tank.
SOLUTION
Contact an authorised W&H service partner. -
Do I need to carry out periodic testing on my W&H sterilizer?
All W&H sterilizers feature test cycles (B&D/Helix test, Vacuum test). Compulsory and frequency of testing are regulated by local/national guidelines.
-
Warning about saving to the USB (HTML and SCL files)
POSSIBLE CAUSE
The USB drive is disconnected or full.
SOLUTION
Check presence and condition of the USB drive. If the problem persists, contact an authorised W&H service partner. -
Which water quality should I use for my sterilizer?
The water quality for sterilizers is internationally specified by standards and directives. The reasons for this are that your sterilizer can be seriously damaged by it or the sterilization can be jeopardised. Consequently, only water with conductivity of less than 10 µS/cm in North America and 15 µS/cm for the rest of the world should be used for your W&H sterilizer. The Water treatment devices Multidem and Osmo are especially designed to prepare suitable water (see chapter “Water quality” in the Instructions for Use).
-
Which is the maximum noise level of Lyla?
-
Lara XL (24)
-
Do I need to document the results of all periodic tests?
W&H recommends recording all periodic tests, repairs, and modifications on the sterilizer in a logbook including date and signature of the person who carried out the test or other activity. Compulsorily of recording is regulated by local/national guidelines.
-
Warning about programmed maintenance.
POSSIBLE CAUSE
The maintenance program needs to be carried out.
SOLUTION
Contact an authorised W&H service partner. -
The sterilization (PROCESS) phase of a sterilization cycle was longer than expected.
POSSIBLE CAUSE
The chamber temperature dropped below the minimum threshold and the software performed a successful recovery.
SOLUTION
Wait for cycle completion. If the problem occurs frequently, contact an authorised W&H service partner. -
The sterilizer enters into “Standby mode” immediately after being switched on.
POSSIBLE CAUSE
The unit was turned off while in standby mode.
SOLUTION
Press the standby mode button to exit. -
When starting a cycle, the chamber door locks but re-opens immediately. The “Open the door” message appears.
POSSIBLE CAUSE
Door seal not properly placed.
SOLUTION
Ensure that the door seal is correctly inserted around the whole circumference.
POSSIBLE CAUSE
Door jammed by external objects or by the load itself.
SOLUTION
Remove any objects interfering with the chamber door. Check for interference between the door and the chamber furniture and/or the load. -
No cycles are stored in the cycle history menu.
POSSIBLE CAUSE
An electronic board was replaced when serviced.
SOLUTION
The memory of the old board can not be restored. Consult the cycle history in the USB pen drive. -
Stains, spots, or colour change on instruments.
POSSIBLE CAUSE
Instruments rinsed with tap water and not dried before sterilization.
SOLUTION
Ensure that instruments are rinsed with distilled or demineralized water and completely dry before they are placed in the sterilizer.
POSSIBLE CAUSE
Use of water of poor quality or water containing chemical substances.
SOLUTION
Drain both water tanks. Use good quality water (see chapter “Water quality” in the Instructions for Use).
POSSIBLE CAUSE
Organic or chemical residues on the instruments
SOLUTION
Clean, rinse, and dry instruments before placing them in the sterilizer (see chapter “Load maintenance and preparation” in the Instructions for Use.
POSSIBLE CAUSE
Dirt in chamber, trays, tray rack.
SOLUTION
Clean the chamber and wash the chamber furniture.
POSSIBLE CAUSE
Contact between instruments of different materials.
SOLUTION
Ensure that instruments of different materials do not touch each other (aluminium, carbon or stainless steel, etc.); place them on different trays or cassettes or pouch them (see chapter “Load maintenance and preparation” in the Instructions for Use).
POSSIBLE CAUSE
Scale deposits on the chamber.
SOLUTION
Clean the chamber and use good quality water (see chapter “Water quality” in the Instructions for Use). -
At the end of the cycle, there is residual water on load.
POSSIBLE CAUSE
Sterilizer not properly levelled.
SOLUTION
Place the sterilizator on a flat, level surface.
POSSIBLE CAUSE
Overloaded chamber.
SOLUTION
Comply with the maximum load weight limits for each type of load. Always use the chamber rack for trays and cassettes.
POSSIBLE CAUSE
Chamber filter clogged.
SOLUTION
Remove and clean the chamber filters.
POSSIBLE CAUSE
Chamber filter cap mispositioned.
SOLUTION
Mount the chamber filter cap properly (see chapter “Monthly or 50-cycle maintenance - Cleaning the chamber filter” in the Instructions for Use).
POSSIBLE CAUSE
Load incorrectly placed.
SOLUTION
Follow the recommendations as listed in chapter “Load maintenance and preparation” in the Instructions for Use. -
Water is leaking at the front of the sterilizer.
POSSIBLE CAUSE
Leaks through the chamber door seal.
SOLUTION
Clean or replace the door seal. Clean the door surface facing the chamber.
POSSIBLE CAUSE
Internal leak.
SOLUTION
Contact an authorised W&H service partner. -
The sterilizer remains switched OFF.
POSSIBLE CAUSE
The main switch or network circuit breaker is OFF.
SOLUTION
Activate the main switch or network circuit breaker (ON).
POSSIBLE CAUSE
No voltage at the socket.
SOLUTION
Check the building electrical supply.
POSSIBLE CAUSE
The power cord is not connected properly.
SOLUTION
Check and connect the power cord properly. -
Should I pouch/wrap my instruments and how long can I store them after sterilization?
To ensure that your instruments are stored in a sterile state from their successful sterilization until they are used, W&H recommends wrapping them in suitable sterile barrier systems before sterilization. The recommended storage period can be found in the recommendations of the wrapping material manufacturer. For further information, please contact your dealer.
-
How do I clean the water tanks and what products should I use?
Water tank cleaning instructions are provided in the Instructions for Use, chapter “Maintenance”. In addition, a video description is available: • in the sterilizer, in the maintenance section of the menu; • in the Consumables & Accessories and Video Tutorial section of this website.
-
How do I change consumable components on my sterilizer?
Consumable replacement instructions are provided in the Instructions for Use, chapter “Maintenance”. In addition, a video description is available: • in the sterilizer, in the maintenance section of the menu; • in the Consumables & Accessories and Video Tutorial section of this website.
-
Who should I contact to validate and maintain my sterilizer?
Validation shall be carried out by an official authority. Maintenance tasks shall be carried out by a qualified and authorised technician.
-
Does my sterilizer need any periodic qualification/validation?
Validation generally comprises a range of tests defined in internationally recognised standards. These tests begin for every device with the factory tests at W&H. In addition, corresponding documentation is included with your device. Prior to commissioning the device at your premises, the technician performs further checks to ensure the device functions correctly. Then, depending on the national/regional laws and directives, the device must be subjected to a so-called renewed performance qualification at regular intervals. For further information, please contact your dealer.
-
How long should I archive the documentation of regular tests?
Keep the results according to your country/regional specific laws and guidelines. Those records can be of assistance in case of service as well.
-
The cycle report printer does not work.
POSSIBLE CAUSE
Printer not properly connected or not powered.
SOLUTION
Check the data and power connection to the printer. -
What is validation?
Validation is a testing procedure carried out by an official authority, proving the effectiveness of your sterilizer. Compulsories and frequency of validation are regulated by local/national guidelines.
-
Warning about consumable replacement.
POSSIBLE CAUSE
A consumable needs to be replaced.
SOLUTION
Order the requested consumable (door seal and HEPA/bacteriological filter) and replace it. See the chapter “Maintenance” in the Instructions for Use. -
The sterilizer is connected to an automated water supply system, there is no clean water in the tank and the automatic water filling does not fill the water.
POSSIBLE CAUSE
Water filling system not connected.
SOLUTION
Connect the water filling system to the sterilizer. (see Instructions for Use).
POSSIBLE CAUSE
When the water filling system attempted to fill the tank, water was temporarily unavailable.
SOLUTION
Since the water tank filling is attempted only once in-between cycle execution, this event inhibits water feeding. Switch the sterilizer OFF and then ON again.
Check the external water supply system.
Check for water leaks from the sterilizer.
POSSIBLE CAUSE
Faulty MIN water level sensor in the clean water tank.
SOLUTION
Contact an authorised W&H service partner. -
Do I need to carry out periodic testing on my W&H sterilizer?
All W&H sterilizers feature test cycles (B&D/Helix test, Vacuum test). Compulsory and frequency of testing are regulated by local/national guidelines.
-
What is the maximum noise level of the Lara, Lara XL and Lexa Plus sterilizer?
The max. noise level of Lara is 66.9 dB. The max. noise level of Lara XL/Lexa Plus is 70 dB.
-
Warning about saving to the USB (HTML and SCL files)
POSSIBLE CAUSE
The USB drive is disconnected or full.
SOLUTION
Check presence and condition of the USB drive. If the problem persists, contact an authorised W&H service partner. -
Which water quality should I use for my sterilizer?
The water quality for sterilizers is internationally specified by standards and directives. The reasons for this are that your sterilizer can be seriously damaged by it or the sterilization can be jeopardised. Consequently, only water with conductivity of less than 10 µS/cm in North America and 15 µS/cm for the rest of the world should be used for your W&H sterilizer. The Water treatment devices Multidem and Osmo are especially designed to prepare suitable water (see chapter “Water quality” in the Instructions for Use).
-
Do I need to document the results of all periodic tests?
-
Lisa (24)
-
What is the maximum noise level of the Lisa sterilizer?
The max. noise level of Lisa 2019 is 64.3 dB.
-
Do I need to document the results of all periodic tests?
W&H recommends recording all periodic tests, repairs, and modifications on the sterilizer in a logbook including date and signature of the person who carried out the test or other activity. Compulsorily of recording is regulated by local/national guidelines.
-
Warning about programmed maintenance.
POSSIBLE CAUSE
The maintenance program needs to be carried out.
SOLUTION
Contact an authorised W&H service partner. -
The sterilization (PROCESS) phase of a sterilization cycle was longer than expected.
POSSIBLE CAUSE
The chamber temperature dropped below the minimum threshold and the software performed a successful recovery.
SOLUTION
Wait for cycle completion. If the problem occurs frequently, contact an authorised W&H service partner. -
The sterilizer enters into “Standby mode” immediately after being switched on.
POSSIBLE CAUSE
The unit was turned off while in standby mode.
SOLUTION
Press the standby mode button to exit. -
When starting a cycle, the chamber door locks but re-opens immediately. The “Open the door” message appears.
POSSIBLE CAUSE
Door seal not properly placed.
SOLUTION
Ensure that the door seal is correctly inserted around the whole circumference.
POSSIBLE CAUSE
Door jammed by external objects or by the load itself.
SOLUTION
Remove any objects interfering with the chamber door. Check for interference between the door and the chamber furniture and/or the load. -
No cycles are stored in the cycle history menu.
POSSIBLE CAUSE
An electronic board was replaced when serviced.
SOLUTION
The memory of the old board can not be restored. Consult the cycle history in the USB pen drive. -
Stains, spots, or colour change on instruments.
POSSIBLE CAUSE
Instruments rinsed with tap water and not dried before sterilization.
SOLUTION
Ensure that instruments are rinsed with distilled or demineralized water and completely dry before they are placed in the sterilizer.
POSSIBLE CAUSE
Use of water of poor quality or water containing chemical substances.
SOLUTION
Drain both water tanks. Use good quality water (see chapter “Water quality” in the Instructions for Use).
POSSIBLE CAUSE
Organic or chemical residues on the instruments
SOLUTION
Clean, rinse, and dry instruments before placing them in the sterilizer (see chapter “Load maintenance and preparation” in the Instructions for Use.
POSSIBLE CAUSE
Dirt in chamber, trays, tray rack.
SOLUTION
Clean the chamber and wash the chamber furniture.
POSSIBLE CAUSE
Contact between instruments of different materials.
SOLUTION
Ensure that instruments of different materials do not touch each other (aluminium, carbon or stainless steel, etc.); place them on different trays or cassettes or pouch them (see chapter “Load maintenance and preparation” in the Instructions for Use).
POSSIBLE CAUSE
Scale deposits on the chamber.
SOLUTION
Clean the chamber and use good quality water (see chapter “Water quality” in the Instructions for Use). -
At the end of the cycle, there is residual water on load.
POSSIBLE CAUSE
Sterilizer not properly levelled.
SOLUTION
Place the sterilizator on a flat, level surface.
POSSIBLE CAUSE
Overloaded chamber.
SOLUTION
Comply with the maximum load weight limits for each type of load. Always use the chamber rack for trays and cassettes.
POSSIBLE CAUSE
Chamber filter clogged.
SOLUTION
Remove and clean the chamber filters.
POSSIBLE CAUSE
Chamber filter cap mispositioned.
SOLUTION
Mount the chamber filter cap properly (see chapter “Monthly or 50-cycle maintenance - Cleaning the chamber filter” in the Instructions for Use).
POSSIBLE CAUSE
Load incorrectly placed.
SOLUTION
Follow the recommendations as listed in chapter “Load maintenance and preparation” in the Instructions for Use. -
Water is leaking at the front of the sterilizer.
POSSIBLE CAUSE
Leaks through the chamber door seal.
SOLUTION
Clean or replace the door seal. Clean the door surface facing the chamber.
POSSIBLE CAUSE
Internal leak.
SOLUTION
Contact an authorised W&H service partner. -
The sterilizer remains switched OFF.
POSSIBLE CAUSE
The main switch or network circuit breaker is OFF.
SOLUTION
Activate the main switch or network circuit breaker (ON).
POSSIBLE CAUSE
No voltage at the socket.
SOLUTION
Check the building electrical supply.
POSSIBLE CAUSE
The power cord is not connected properly.
SOLUTION
Check and connect the power cord properly. -
Should I pouch/wrap my instruments and how long can I store them after sterilization?
To ensure that your instruments are stored in a sterile state from their successful sterilization until they are used, W&H recommends wrapping them in suitable sterile barrier systems before sterilization. The recommended storage period can be found in the recommendations of the wrapping material manufacturer. For further information, please contact your dealer.
-
How do I clean the water tanks and what products should I use?
Water tank cleaning instructions are provided in the Instructions for Use, chapter “Maintenance”. In addition, a video description is available: • in the sterilizer, in the maintenance section of the menu; • in the Consumables & Accessories and Video Tutorial section of this website.
-
How do I change consumable components on my sterilizer?
Consumable replacement instructions are provided in the Instructions for Use, chapter “Maintenance”. In addition, a video description is available: • in the sterilizer, in the maintenance section of the menu; • in the Consumables & Accessories and Video Tutorial section of this website.
-
Who should I contact to validate and maintain my sterilizer?
Validation shall be carried out by an official authority. Maintenance tasks shall be carried out by a qualified and authorised technician.
-
Does my sterilizer need any periodic qualification/validation?
Validation generally comprises a range of tests defined in internationally recognised standards. These tests begin for every device with the factory tests at W&H. In addition, corresponding documentation is included with your device. Prior to commissioning the device at your premises, the technician performs further checks to ensure the device functions correctly. Then, depending on the national/regional laws and directives, the device must be subjected to a so-called renewed performance qualification at regular intervals. For further information, please contact your dealer.
-
How long should I archive the documentation of regular tests?
Keep the results according to your country/regional specific laws and guidelines. Those records can be of assistance in case of service as well.
-
The cycle report printer does not work.
POSSIBLE CAUSE
Printer not properly connected or not powered.
SOLUTION
Check the data and power connection to the printer. -
What is validation?
Validation is a testing procedure carried out by an official authority, proving the effectiveness of your sterilizer. Compulsories and frequency of validation are regulated by local/national guidelines.
-
Warning about consumable replacement.
POSSIBLE CAUSE
A consumable needs to be replaced.
SOLUTION
Order the requested consumable (door seal and HEPA/bacteriological filter) and replace it. See the chapter “Maintenance” in the Instructions for Use. -
The sterilizer is connected to an automated water supply system, there is no clean water in the tank and the automatic water filling does not fill the water.
POSSIBLE CAUSE
Water filling system not connected.
SOLUTION
Connect the water filling system to the sterilizer. (see Instructions for Use).
POSSIBLE CAUSE
When the water filling system attempted to fill the tank, water was temporarily unavailable.
SOLUTION
Since the water tank filling is attempted only once in-between cycle execution, this event inhibits water feeding. Switch the sterilizer OFF and then ON again.
Check the external water supply system.
Check for water leaks from the sterilizer.
POSSIBLE CAUSE
Faulty MIN water level sensor in the clean water tank.
SOLUTION
Contact an authorised W&H service partner. -
Do I need to carry out periodic testing on my W&H sterilizer?
All W&H sterilizers feature test cycles (B&D/Helix test, Vacuum test). Compulsory and frequency of testing are regulated by local/national guidelines.
-
Warning about saving to the USB (HTML and SCL files)
POSSIBLE CAUSE
The USB drive is disconnected or full.
SOLUTION
Check presence and condition of the USB drive. If the problem persists, contact an authorised W&H service partner. -
Which water quality should I use for my sterilizer?
The water quality for sterilizers is internationally specified by standards and directives. The reasons for this are that your sterilizer can be seriously damaged by it or the sterilization can be jeopardised. Consequently, only water with conductivity of less than 10 µS/cm in North America and 15 µS/cm for the rest of the world should be used for your W&H sterilizer. The Water treatment devices Multidem and Osmo are especially designed to prepare suitable water (see chapter “Water quality” in the Instructions for Use).
-
What is the maximum noise level of the Lisa sterilizer?
 Piezo Scaler

-
Proxeo Ultra (14)
-
Can the handpiece be prepared in the sterilizer?
Yes, as long as your handpiece or contra-angle handpiece carries the mark “sterilizable up to the stated temperature”.
-
Should I always call my service department first before I send devices/instruments for repair?
If you are unsure of the cause of the problem, it is better to contact your service department first and talk to a technician. Together with the technician, malfunctions can sometimes be resolved or it may be determined which items need to be sent for repair.
-
Are W&H tips (e.g. 1U) compatible with the new W&H high-speed mounting system?
No, they are not compatible because they have different threads.
-
How do I know which tip goes with which handpiece?
There are symbols on the tip, the tip changer and the handpiece identifying which system they belong to.
-
Are the new handpieces compatible with the PA-123/PA-115?
No, they are not compatible.
-
Are the new handpieces (PB-5 L, PB-5 L S, PB-5 L Q) compatible with the earlier generation of Piezo scalers?
No, they are not compatible.
-
Is the handpiece thermo washer disinfectable?
Yes, as long as your handpiece or contra-angle handpiece carries the mark “thermo washer disinfectable”.
-
Can I prepare the handpiece in universal hygiene devices (DAC-Universal)?
Yes.
-
How can I recharge the wireless foot control (PB-530)?
The wireless foot control can be recharged by plugging the power pack directly into the device.
-
How can I connect the wireless foot control with the Proxeo ULTRA PB-530?
Set the power regulator to “OFF”. Connect the control unit and the foot control using the cable. Press and hold the function button for 5 seconds.
-
Can I disinfect the tank by wiping it down?
Yes.
-
Can I disinfect the tank using the thermo washer?
No.
-
Can I treat patients with cardiac pacemakers with W&H Piezo scalers?
Yes, the compatibility of these devices has been assessed in application.
-
How long does the foot control’s rechargeable battery last?
The rechargeable battery lasts approx. two months based on average use (5 working days with 8–12 patients/day for 4–6 minutes).
-
Can the handpiece be prepared in the sterilizer?
 Air Motor

-
Does the air motor need to be greased?
Yes, the air motor must be greased as described in the "Hygiene and care" section of the instructions for use.
